

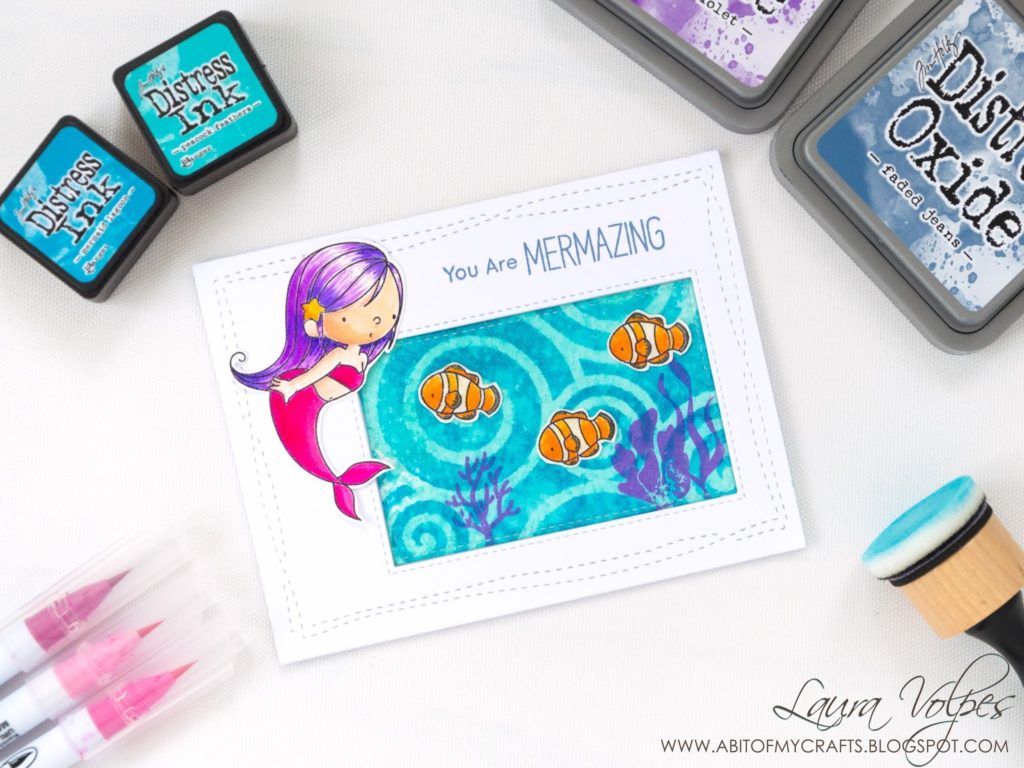
Hello everyone! Today I want to share a card I made using the MFT Mermaizing stamp set and a stencil by Create a Smile Stamps. For the background I used Distress Inks, for the corals, the seaweed and the sentiment I used Distress Oxides, and to color my images I used my Zig Clean Color Real Brush Markers. I also recorded a short video in which I describe how I made this card. It is not a video tutorial, in the sense that I do not show the actual card making process, but I just tell you about all the steps I took and the products I used to make this card. I hope you will have a look at it and I would love for you to let me know what you think about this kind of videos.
Enjoy!
And here is the list of all the supplies I used:
Color Copy 300 gsm white cardstock
Strathmore Bristol Smooth cardstock
Canson XL watercolor cardstock
Crafters Companion Clear Acetate
EK success Cutterbee scissors
Tonic Studios Guillotine Trimmer
Stencil by Create a Smile Stamps
Ranger mini ink blender
Distress Ink mini cubes – Peacock Feathers and Mermaid Lagoon
Distress Oxides – Wilted Violet and Faded Jeans
Zig Clean Color Real Brush Markers
Spectrum Noir clear overlay pen
Wonky Stitched Rectangle dies by Avery Elle
Inside out Stitched Rectangle Die-Namics by MFT
Scotch Foam Tape
Funky Tape Runner by Tonic Studios
Tombow Mono Multi liquid glue
My Favorite Things Marmaizing stamp set
Acrylic block by Knorr Prandel
With this card I participate in the challenge over at the Danipeuss blog.
And that’s pretty much it for today’s post! I really hope you like my card and you enjoyed the video, and as i said I would love to hear your honest feedback. And make sure to come back next week for LOADS of fun projects! Have a great day!

CARD CON TIMBRI MERMAZING DI MFT, DISTRESS INKS E DISTRESS OXIDES
Ciao a tutti! Oggi voglio mostrarvi una card che ho realizzato con il set di timbri Mermaizing di My Favorite Things e uno stencil di Create a Smile Stamps. Per lo sfondo ho utilizzato I miei Distress Ink, per le alghe, I coralli e il messaggio ho utilizzato i miei Distress Oxide Ink, e per colorare le immagini ho usato i miei Zig Clean Real Color Brush Markers. Ho anche registrato un video in cui descrivo come ho realizzato la card. Non è un video tutorial, nel senso che il video non mostra le varie fasi del processo di creazione della card, ma semplicemente spiego i vari step e mostro i prodotti utilizzati. Spero che sia utile, e mi farebbe molto piacere sapere cosa ne pensate. Buona visione!
Ed ecco la lista dei prodotti utilizzati:
Cartoncino bianco Color Copy 300 gsm
Cartoncino Strathmore Bristol Smooth
Cartoncino Canson XL watercolor
Crafters Companion Clear Acetate
Forbici EK Success Cutterbee
Tagliacarte a ghigliottina di Tonic Studios
Stencil di Create a Smile Stamps
Ranger mini ink blender
Distress Ink mini cubes – Peacock Feathers e Mermaid Lagoon
Distress Oxides – Wilted Violet e Faded Jeans
Zig Clean Color Real Brush Markers
Penna glitter Spectrum Noir clear overlay
Wonky Stitched Rectangle dies di Avery Elle
Inside out Stitched Rectangle Die-Namics di MFT
Nastro in schiuma biadesivo 3M
Funky Tape Runner di Tonic Studios
Colla Tombow Mono Multi
Set di timbri Mermaizing di MFT
Acrylic block set di Knorr Prandel
Con questa card partecipo alla challenge sul blog Danipeuss.
E questo è tutto per il post di oggi! Spero che la card e il video vi siano piaciuti, fatemi sapere cosa ne pensate! 🙂 E non dimenticate di tornare la prossima settimana per non perdere tante bellissime novità!
Vi auguro una buona giornata, e a presto!


Comments
The Zig Brush Markers & Distress Oxides are on my wish list.I love them!The mermaid is just precious!! Adorable card my friend!!
Have a wonderful day,
Migdalia
Crafting with Creative M
Author
Thank you so much, Migdalia, you are so sweet! I enjoy coloring with my Zigs and I am still experimenting with my Oxides, but I love that you can stamp with them!!! Thank you for stopping by and have a great day!
Laura this is such a pretty mermaid creation.
Hugs
Desíre
{Doing Life – my personal blog}
Author
Thank you so much, Desire!
Love your gorgeous design Laura. You are Mermazing
Author
You are so kind, Kellie! Thank you so much!
That's quite a beautiful card, Laura! Thank you so much for joining us once again at our danipeuss.de card challenge!
Author
Thank you so very much! It's always fun to play along in your challenges, you have great themes!