

Hi everyone! Today I am back with a card and a video showing how to create a woodland scene with some gorgeous Alice in Wonderland stamps by Impronte d’Autore.
I shared this card on my Instagram profile last fall, and I finally managed to edit and upload the video! I decided to create a mini series, so one video will be focused on the scene building process, with a bit of coloring included, and the second video will be a speed coloring video of all the images in this card (except for the kitten…thank you so much, camera, for switching off! 😞).
But let’s have a look at the card making process.
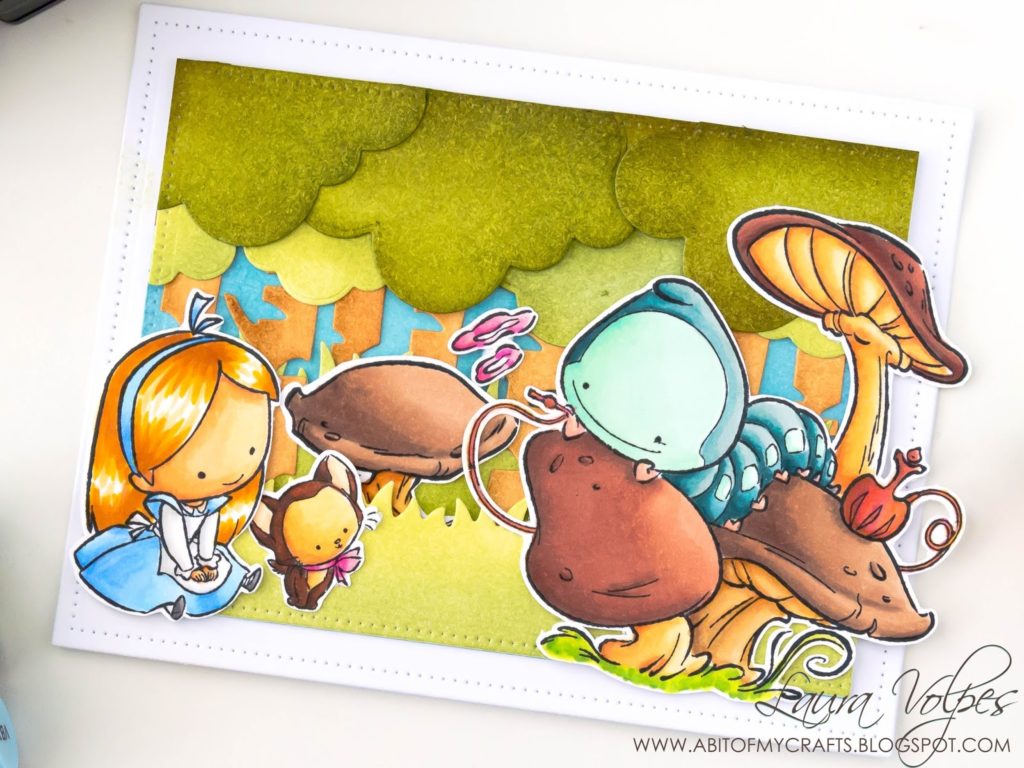
To start off this card I stamped all my images on some Neenah Solar White 110lb cardstock with Memento Tuxedo Black ink, and I colored them with my Spectrum Noir markers. These stamps come with coordinating dies, but I don’t have them (yet), so I cut them using my Silhouette Portrait and the Pix Scan Mat.

I have quite a few elements on my background scene, and I created all of them by ink blending Distress Inks on Strathmore Bristol Smooth cardstock. I also used a bunch of different dies to create each element.
- For the grassy borders I used the My Favorite Things Grassy Fields Die-Namics to create two panels that I layered on top of each other. I blended Distress Inks in Bundled Sage and Shabby Shutters on the one that was going to go in the front, and Bundled Sage, Shabby Shutters and Peeled Paint on the one that I wanted to place in the back.
- For the trees I used the Craftin Desert Divas Outdoor Landscape 2 dies and Distress Inks in Tea Dye and Vintage Photo.
- I cut the sky panel using the Dotted Patterns – Set 1 Creative Dies by Studio Katia, and blended Distress Inks in Broken China and Stormy Sky.
- For the foliage on the trees I used the Lawn Fawn Puffy Clouds dies and I ink blended them as follows: on the smallest die cuts I used Shabby Shutters and Bundled Sage, on the medium ones I used Bundled Sage and Peeled Paint, and on the largest ones I used Peeled Paint and Forest Moss.
I then assembled the woodland scene: I first glued the grassy borders to the sky, then added the tree trunks, and finally the foliage on the trees. I used liquid glue and a fine tip applicator, to be able to control the amount of adhesive I was putting down.
I mounted the scene on a white panel that I cut using one of the dies in the Studio Katia Darling Ribbon and Dotted Frames Creative Dies, and finally I adhered my characters.
And that’s it for today’s card! I also created a mini video series I uploaded on my YouTube channel. The first video is a step by step card making tutorial, and the second one is a speed coloring video of the images used in this card.
You can watch the mini series on my YouTube channel.
And if you enjoy it, you can let me know by leaving a comment on my YouTube channel, liking my videos, and subscribing to my channel! I really appreciate your support!
And that’s it for today! I really hope you like this card and enjoyed the video! Thank you all so much for stopping by and have a great day!
List of Supplies
Impronte d’Autore Paese delle Meraviglie clear stamp set (available in English as red rubber stamp)
Impronte d’Autore Brucaliffo clear stamp set (available in English as red rubber stamp)
Studio Katia Darling Ribbon and Dotted Frames Creative Dies
Studio Katia Dotted Patterns – Set 1 Creative Dies
My Favorite Things Grassy Fields Die-Namics
Craftin Desert Divas Outdoor Landscape 2 Dies
Lawn Fawn Puffy Clouds dies
Neenah Solar White 110 lb cardstock
Strathmore Bristol Smooth cardstock
Color Copy 300 gsm cardstock
Spectrum Noir Markers
Distress Inks
Ranger Mini Ink Blender
Big Shot Express Die cutting machine
Silhouette Portrait
Pix Scan Mat


Comments
This scene is very cool! I have bookmarked your tutorial so that I can come back and do it when I have time .
Hugs,
Chriss
Author
I will be looking forward to seeing it!!! 🙂