Hi everyone! Today I am back with a card and a video I made for the new Create a Smile Stamps challenge. We had some wonderful entries for the last challenge, and we can’t wait to see what you create for this one!
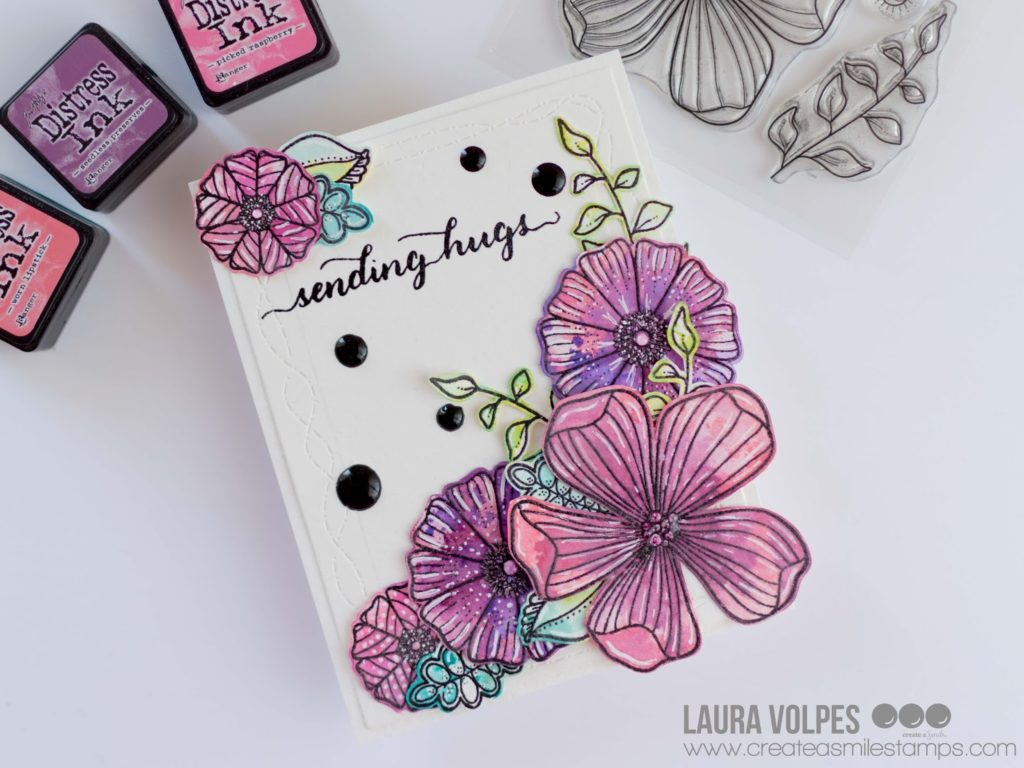
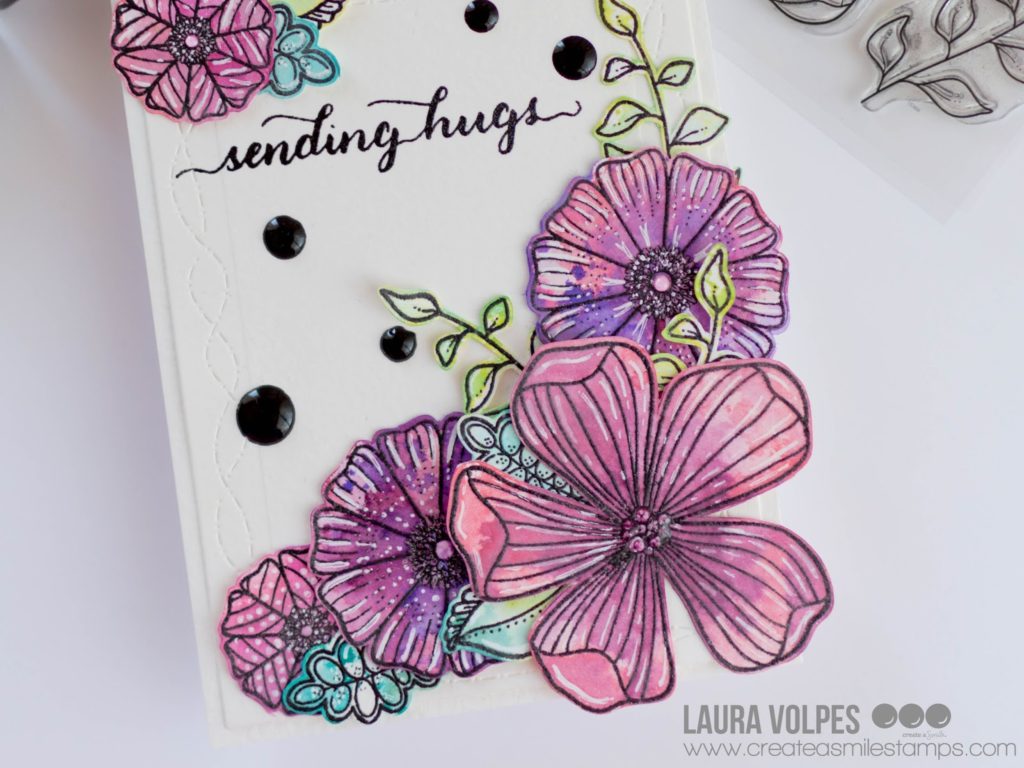
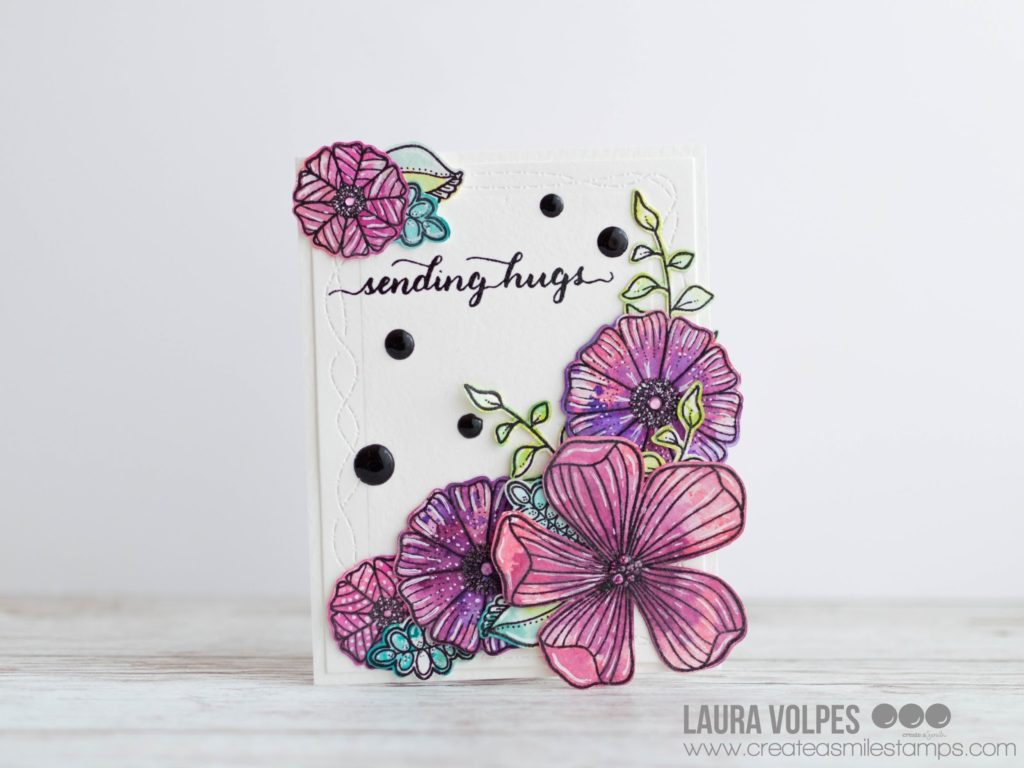
Inspired by the theme of the challenge, I decided to experiment with Distress Inks and the gorgeous florals in the In Bloom stamp set, and to create my splatters by painting the flowers with the ink smooshing technique. This is a great way to easily add a fun watercolor look to your cards, without necessarily being super skilled at watercoloring.
As a first step I stamped my images on some Canson XL watercolor cardstock using Versafine Onyx Black ink and I heat embossed them with clear embossing powder. I then fussy cut everything with my EK Success Cutterbee scissors.
In order to add color to the flowers I proceeded as follows. I first took Distress Inks in Seedless Preserves, Milled Lavender and worn Lipstick, and I pressed them onto my Tonic Studios Easy Clean Mat. I activated the inks with water, and then I placed the flowers face down onto the inks. I repeated the process several times, always drying the flowers with my heat tool in between layers. To differentiate the flowers from one another I added some Wilted Violet to the middle sized ones, and some Picked Raspberry to the smallest ones.
I repeated the same technique on the leaves as well, for which I used Twisted Citron, Cracked Pistachio, Evergreen Bough, Peacock Feathers and Mermaid Lagoon.
To give an extra touch to the flowers I added some highlights with a white gel pen.
For the sentiment I used the Create a Smile Stamps Just Because set. I cut some Canson XL watercolor cardstock with the Avery Elle Wonky Stitches Elle-ments die, stamped the sentiment with Versafine Onyx Black ink, and heat embossed it with clear embossing powder. I mounted this panel on an A2 base that I cut from some more Canson watercolor cardstock, and then I assembled my floral composition.
To finish off the card I added some Nuvo Drops in Morning Dew to the center of the flowers, and some more Drops in Ebony Black on my card base.
I also created a step-by step video tutorial for this card – you can watch it on my YouTube channel.If you like it, you can let me know by leaving a comment or a thumbs up 🙂 And if you want to see more from me, you can subscribe to my channel by clicking on the button below 🙂 Thank you so much! 🙂
And that’s it for today! I really hope you liked this card and enjoyed the video! Don’t forget that you can enter your projects for a chance to win a 25€ gift certificate to the Create a Smile Stamps Shop. The projects need to follow the challenge theme and to feature at least one product by Create a Smile Stamps as the main focal point (check out their freebies in case you’d like to play along and you don’t own any of their products…yet 😛 ).
List of supplies
Create a Smile Stamps In Bloom Clear Stamp Set
Create a Smile Stamps Just Because Stamp Set
Avery Elle Wonky Stitches Elle-ments die
Canson XL Watercolor cardstock
Versafine Onyx Black ink
Distress Inks – Seedless Preserves, Milled Lavender, Worn Lipstick, Picked Raspberry, Wilted Violet, Cracked Pistachio, Evergreen Bough,
EK Success Cutterbee scissors
Crelando Clear Embossing Powder
Crelando Heat Gun
Mini MISTI
Tonic Studios Easy Clean Mat
Tonic Studios Maxi Guillotine Trimmer
Big Shot Express
Like this:
Like Loading...


Comments
There was not an option to like your video. I would like to see more of your work. TYFS
Author
Thank you very much! You can follow me on social media if you want to see more 🙂
And you can only like videos if you watch them directly on YouTube. Thanks for watching and commenting!