Privacy & Cookies: This site uses cookies. By continuing to use this website, you agree to their use. To find out more, including how to control cookies, see here: Cookie Policy
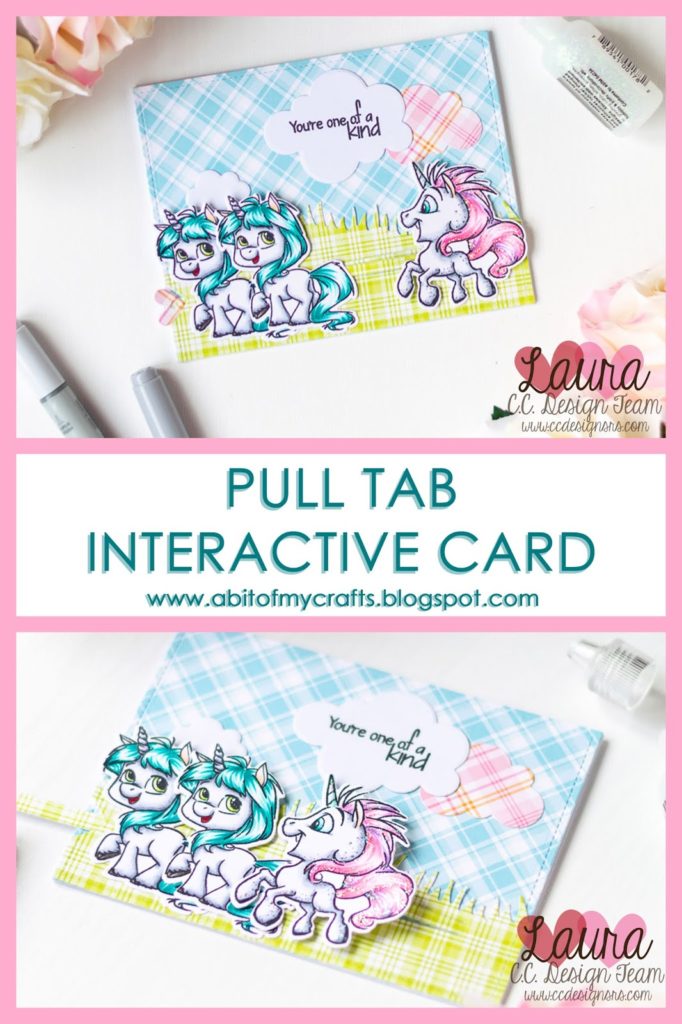
This die is really fun and easy to use, and I thought I would share a step by step photo tutorial on how to use it to create your own interactive pull tab card.
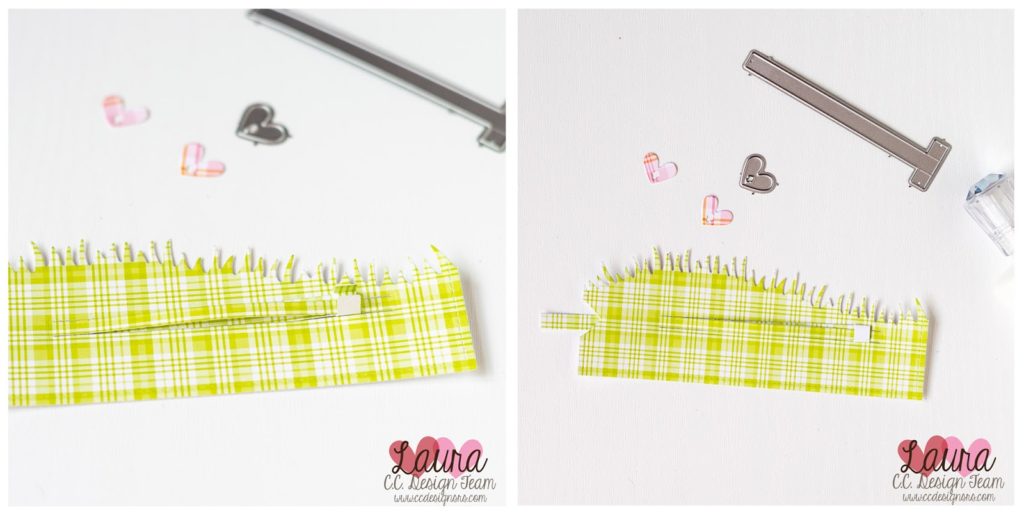
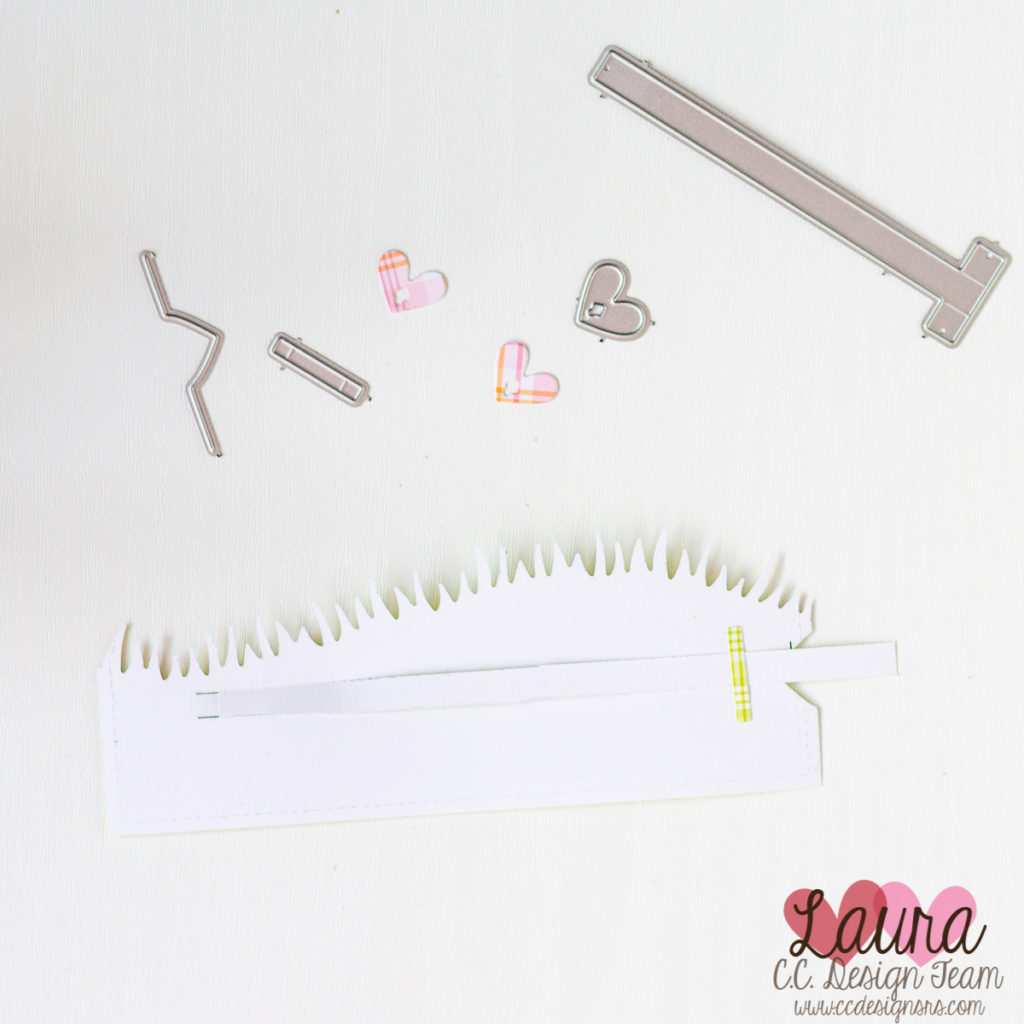
I then did some more die cutting in order to create the rest of the elements. (right picture). I die cut two hearts that will be the ends of my pull tab, a heart-shaped notch on the edge of the grassy hillside, the pull tab itself (the t-shaped die cut), and a little rectangle that can be used as a guide so that the pull tab slides nice and straight (more on this later). I used the extended die cutting technique to obtain a longer pull tab. I also made sure that the heart shaped notch in the grassy hillside was aligned with the slit I had previously die cut.
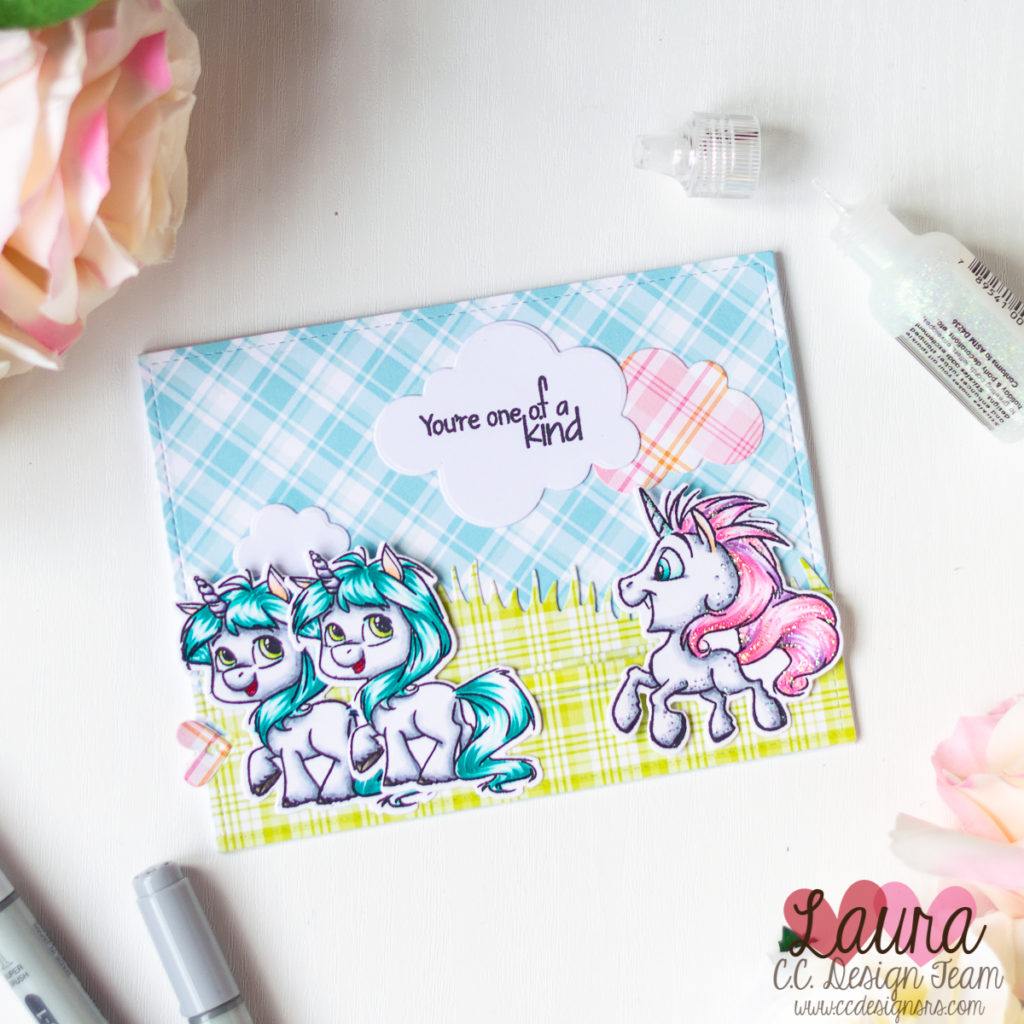
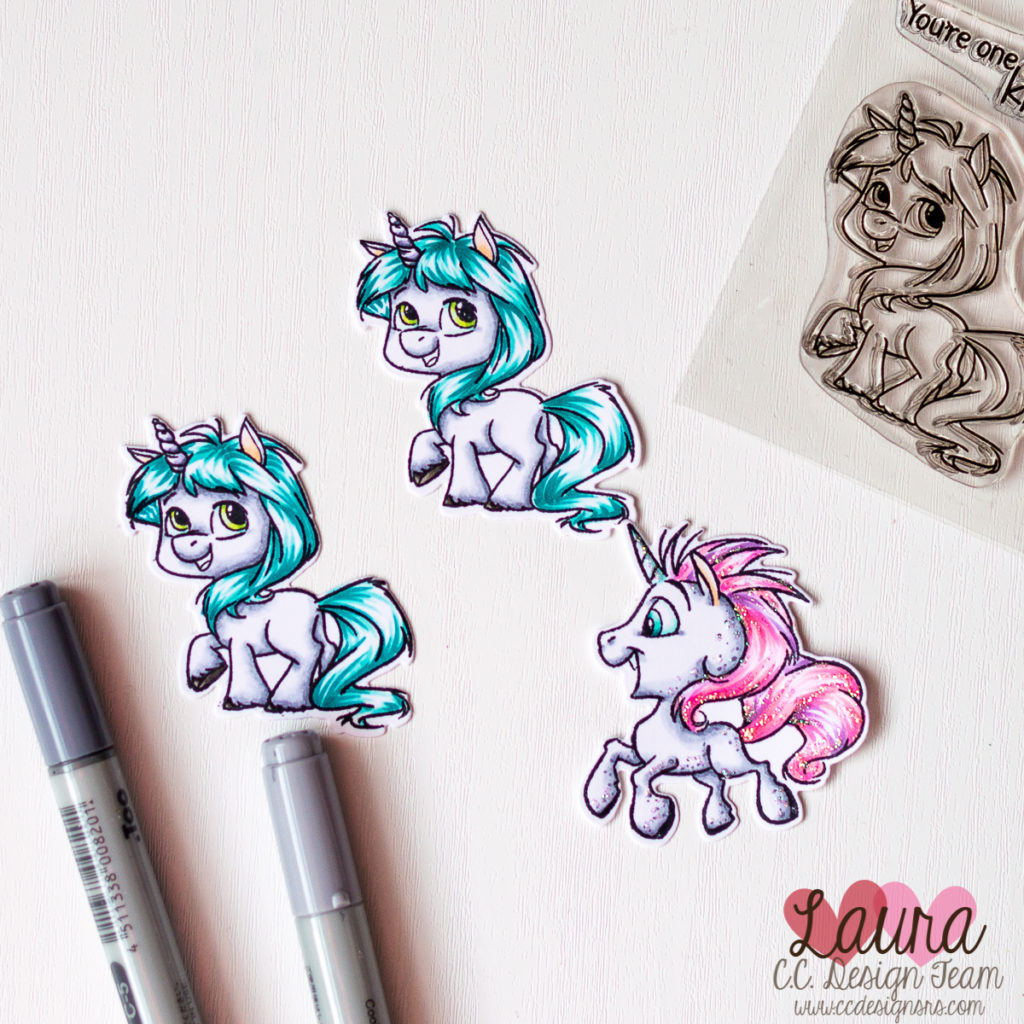
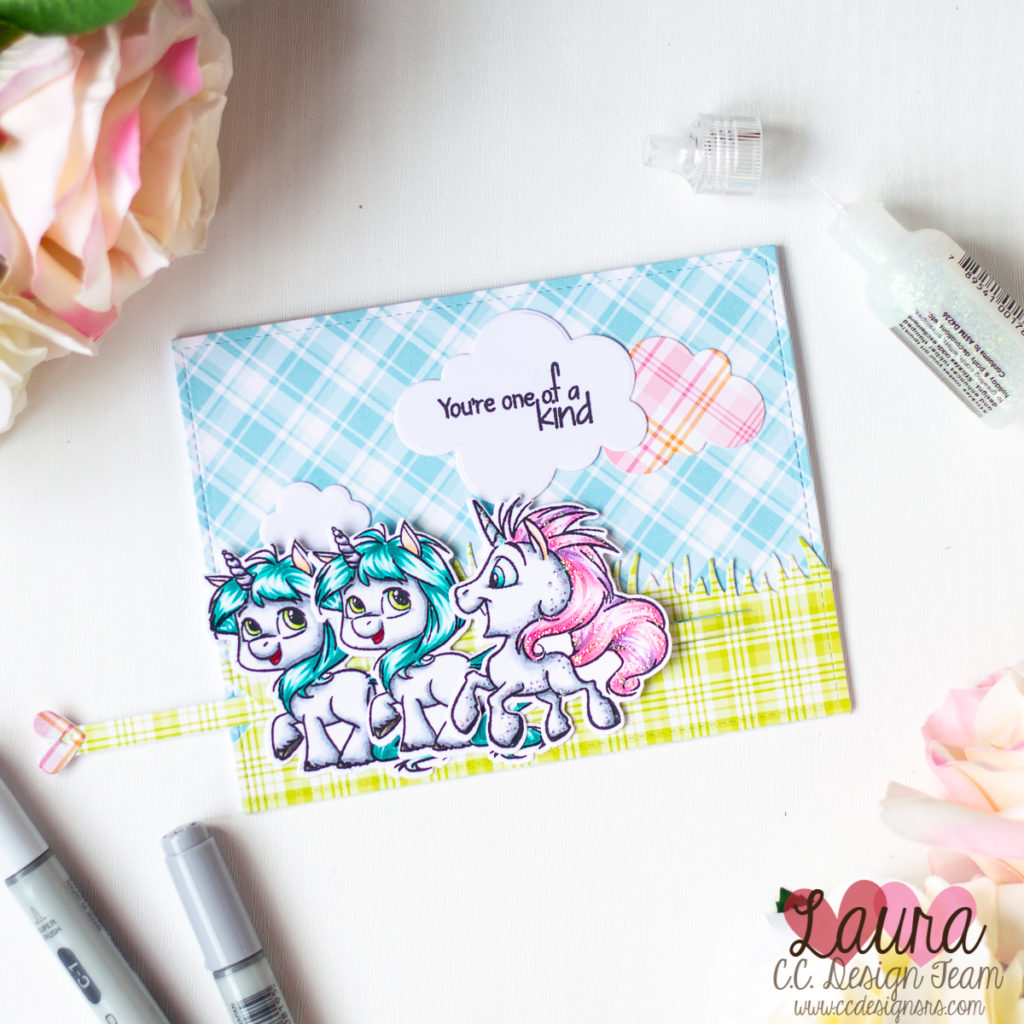
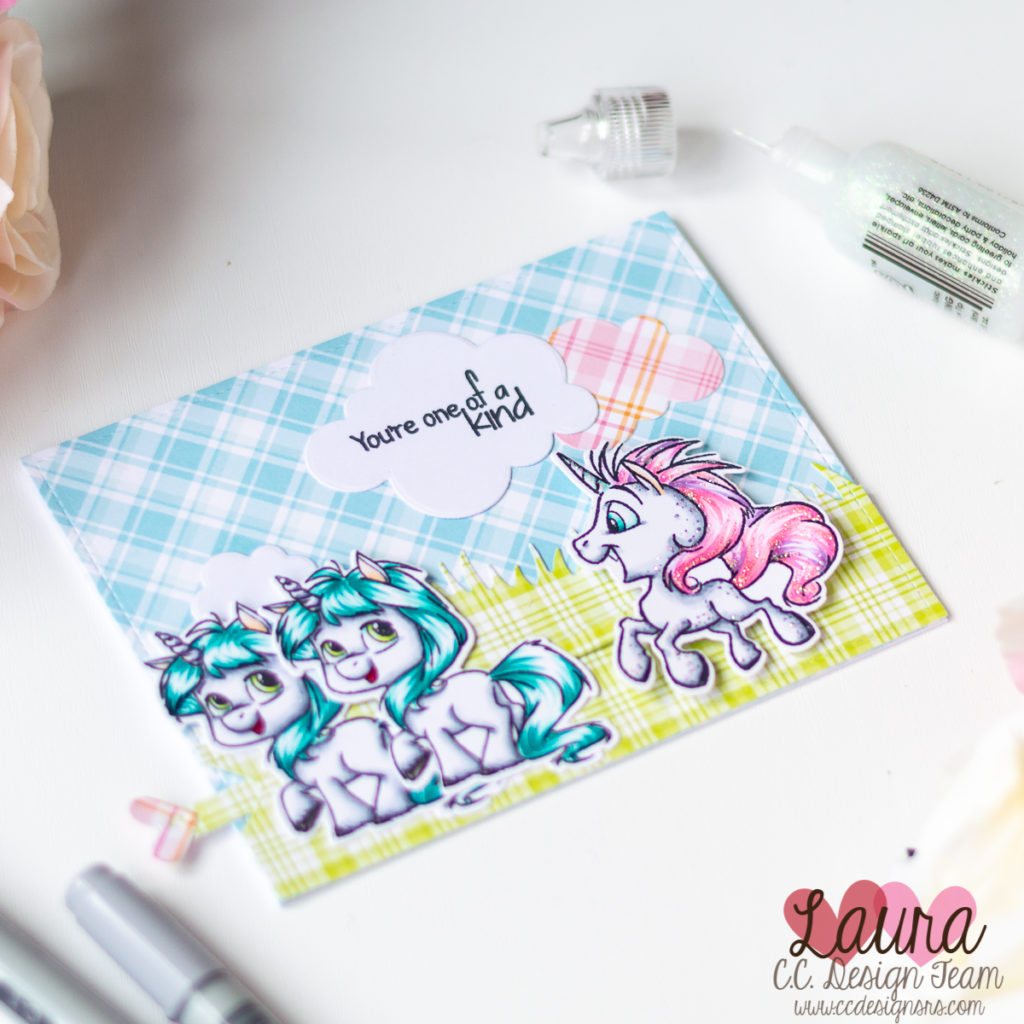
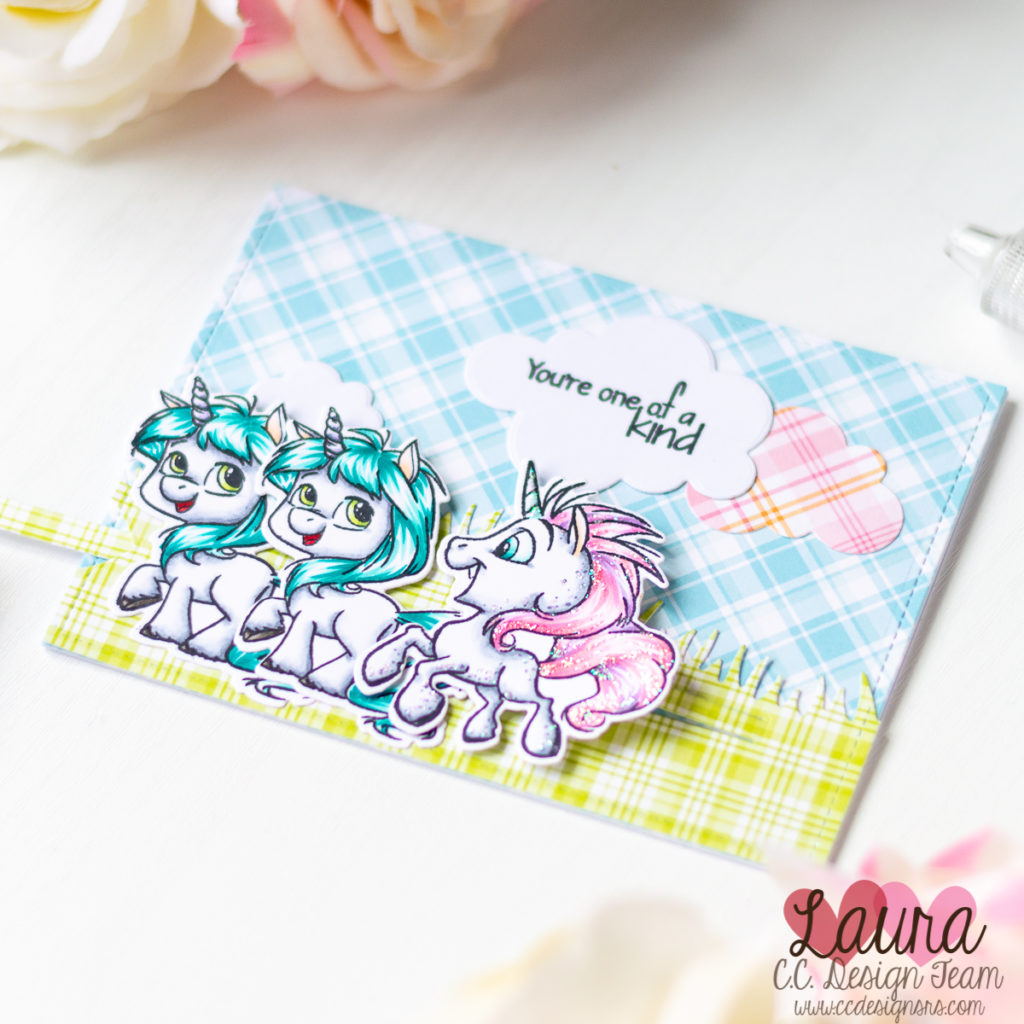
I then moved on and started working on my images. They are all part of the Unicorns stamp set, and I think they are super cute! I stamped them with Memento Tuxedo Black Ink on Neenah Solar White 110lb cardstock, and colored them with Copic Markers.
Once I was done coloring I die cut the images with the coordinating dies. I also added some Crystal Stickles to the mane and tail of the “crazy” unicorn, and on the areas of the skin where I had created dots with my Copic.
I then started assembling the pull tab mechanism. I positioned the pull tab die under the slit I had die cut in the grassy hillside. I bent the two side flaps of the pull tab upwards and slid them through the opening (left picture).
I then folded them on top of each other and glued them together with a tiny little bit of glue (right picture).
I turned the panel upside down and glued the little die cut rectangle towards the outer edge of the hillside, where the card recipient will pull the tab. This allows the tab to move nice and straight.
And this is how I put the pull tab mechanism together. Easy-peasy. 🙂
One piece of advice: if I was to make this card again I would use a bit of a sturdier cardstock for the pull tab. It still works as it is, but, if the paper was a little bit thicker, it would be easier to push the tab back in its original position.
And now back to the card. 😊 Once I had my pull tab mechanism ready I could go ahead and assemble everything.
First of all I taped the hill to the sky. I then glued the unicorn with the pink and purple hair to the flaps of the pull tab mechanism, (basically to that little white square that peaks from under the slit – you can see it in the picture before the last one). Lastly, I glued the remaining two unicorns to the other side of the hill.
I used the Lawn Fawn Simple Puffy Clouds to die cut some white cardstock as well as some more patterned paper from the Lawn Fawn Perfectly Plaid Paper Pad. I stamped the sentiment You’re One of a Kind (isn’t it perfect for this card?!) on one of the white clouds with Memento Tuxedo Black ink and mounted everything on a top-folding A2 card base.
And that’s it for today! I really hope you enjoyed this tutorial, and I hope I inspired you to create with the C.C. Designs Unicorns and the Pull Tab Cutter Die. Thank you all so much for stopping by, and have a great day!
When possible, affiliated links are used at no additional cost to you. This means that if you make a purchase through one of these links, I will get a small commission at no additional cost to you. The money I earn this way goes towards running this blog and my YouTube channel. Thank you for supporting my creative journey! 💖


Comments
I LOVE THIS! Great glitter!!!
Author
Thank you so much, Meghan!