


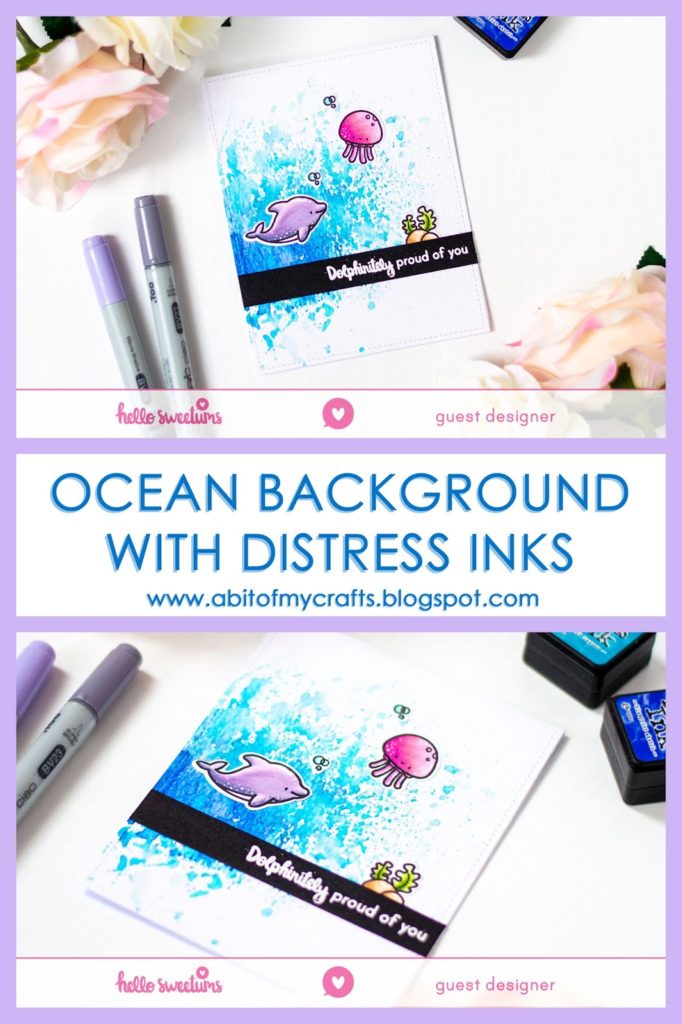
For the first one I used Distress Inks and the Ink Smooshing technique. I started by pressing the ink pads over my work surface to release the pigment, which I diluted with some water from a spray bottle. I then picked up the inks with a piece of acetate and brought the acetate to my paper, to create this fun, splashy look.
The colors I used are Blueprint Sketch, Mermaid Lagoon and Tumbled Glass. I added them in layers, making sure to dry each layer with a heat tool between applications. The cardstock I used is Tim Holtz watercolor cardstock, which I die cut with an A2 stitched rectangle die.
I heat embossed the sentiment with white embossing powder over some black cardstock and glued everything to the card front. For an extra dimensional touch I also added Nuvo Drops in Morning Dew to the air bubbles.
And that is it for card number one!
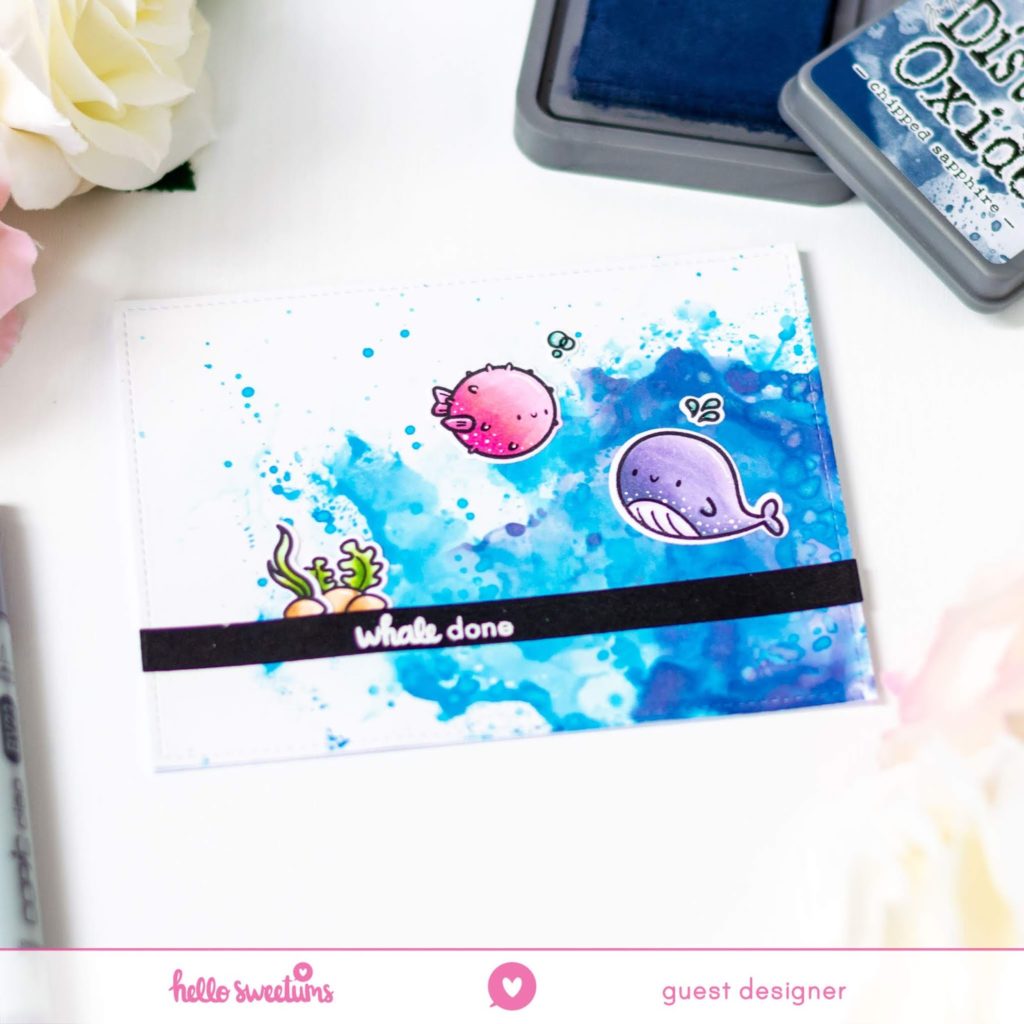
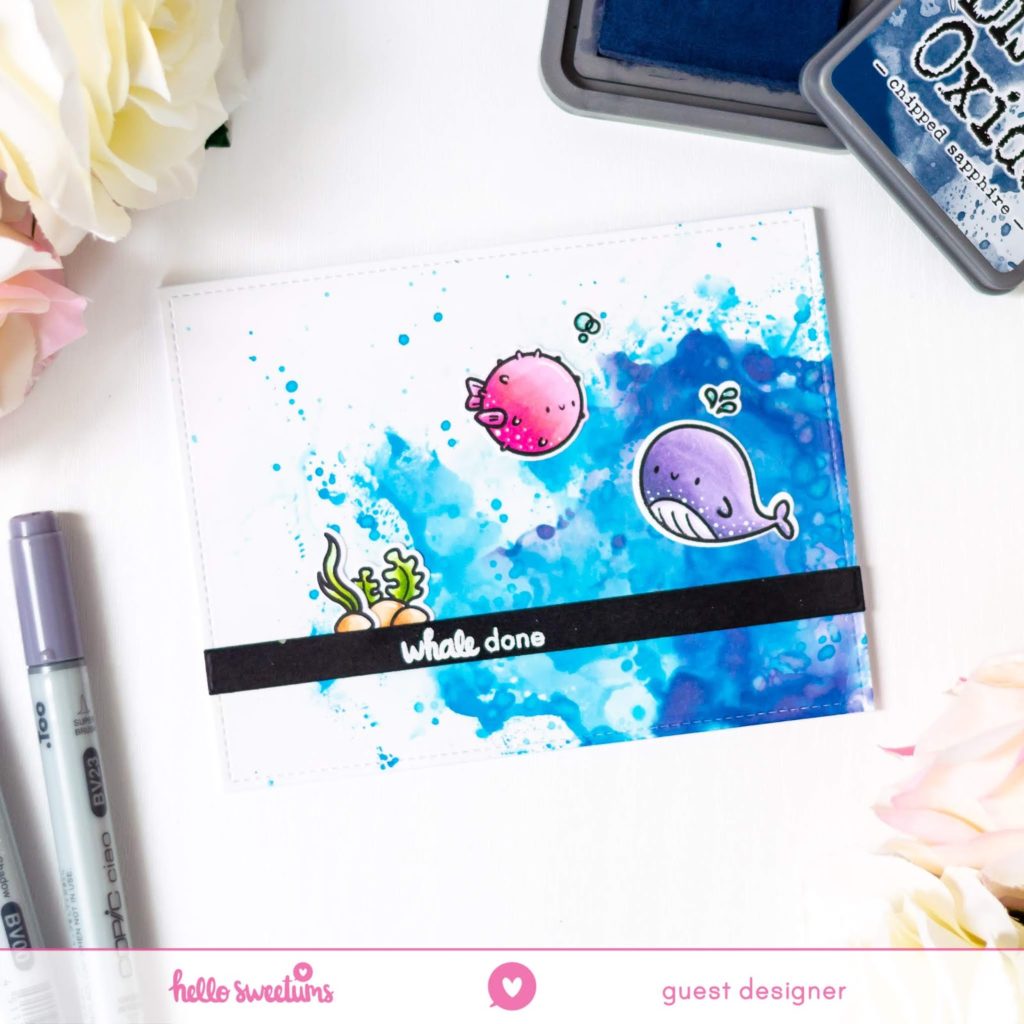
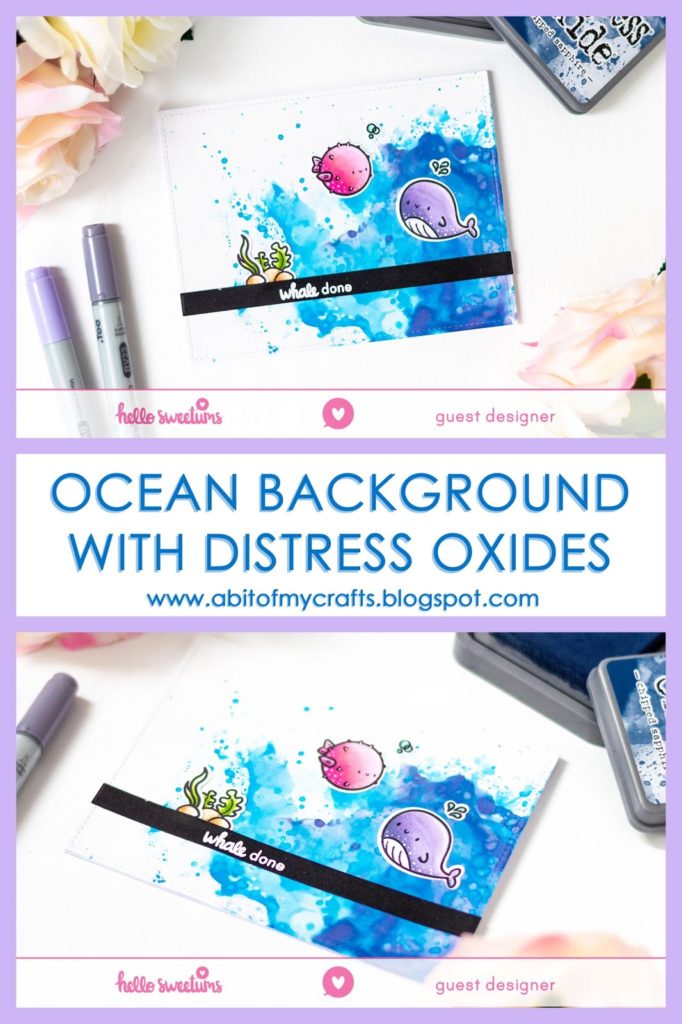
For my second card I used again the ink smooshing technique, but this time around I used Distress Oxides on glossy cardstock. This is a very fun technique and it has such a wow effect! You definitely need to try it!
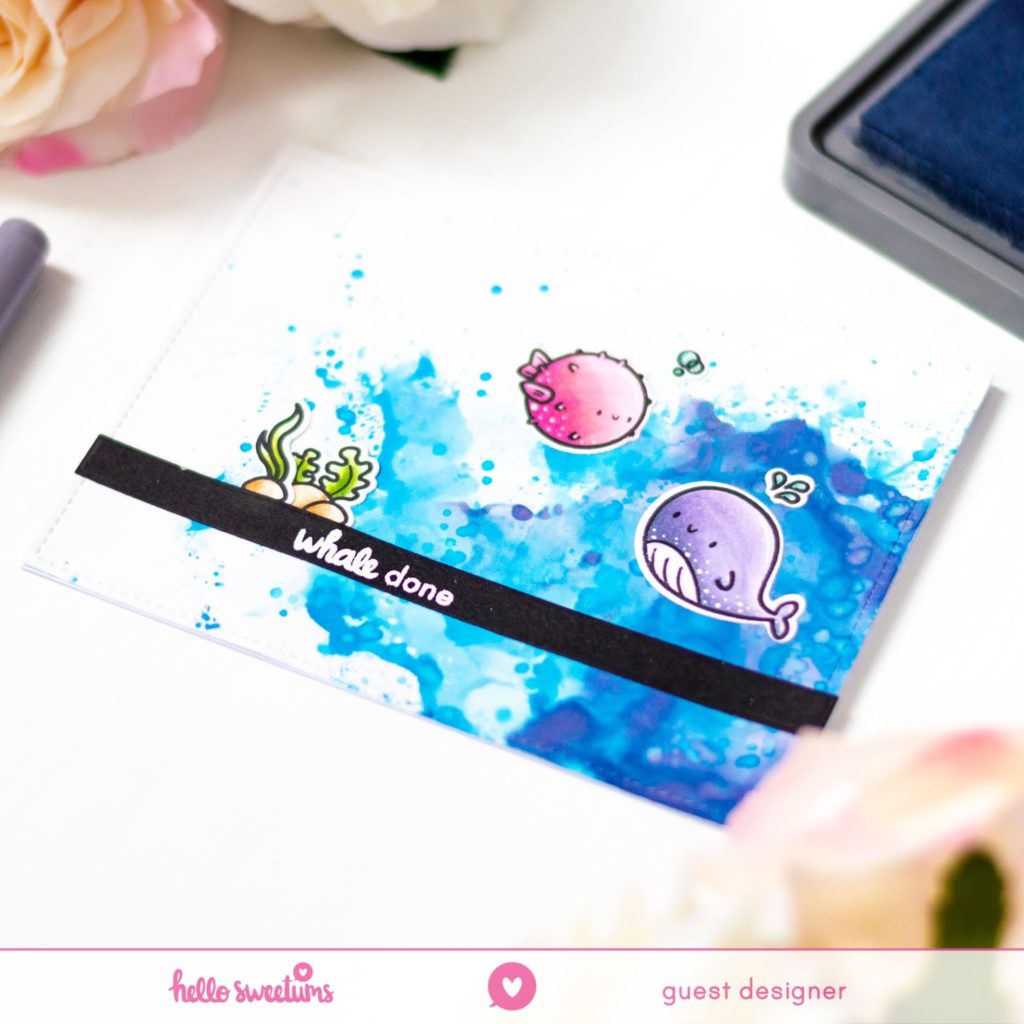
I used Distress Oxides in Chipped Sapphire, Salty Ocean and Tumbled Glass. I first applied them to my Ranger Glossy Cardstock like I described for the first card (it’s important that you use this specific paper for this technique). Then, once everything was dry, I used a foam blender to coat the entire panel with Distress MicroGlaze. The glaze has the effect of brightening up the Oxides and emphasizing their texture, and I think that the result is really beautiful!

Also for this card I die cut the background with an A2 stitched rectangle, embossed the sentiment with white embossing powder over some black cardstock, and added clear Nuvo Drops to the air bubbles and the water droplets above the whale.
And that was card number two, absolutely adorable!
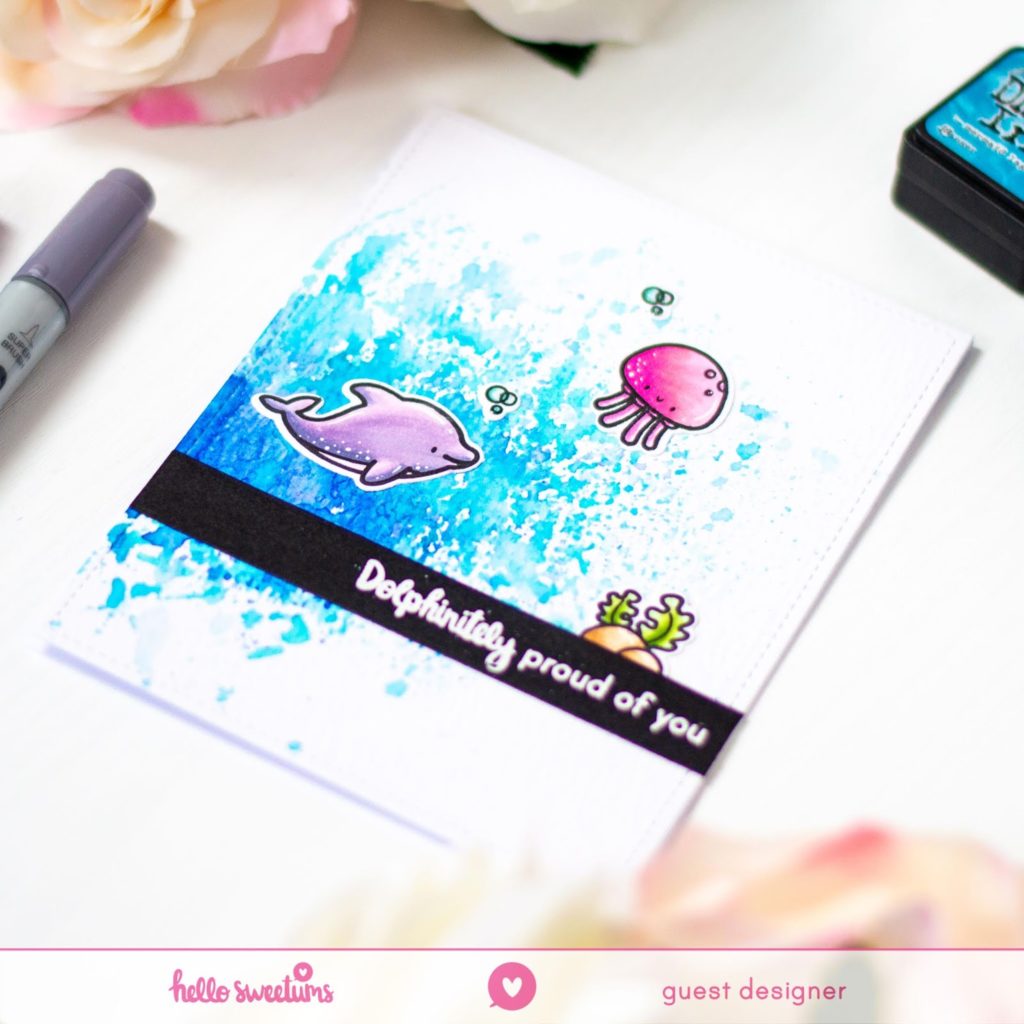
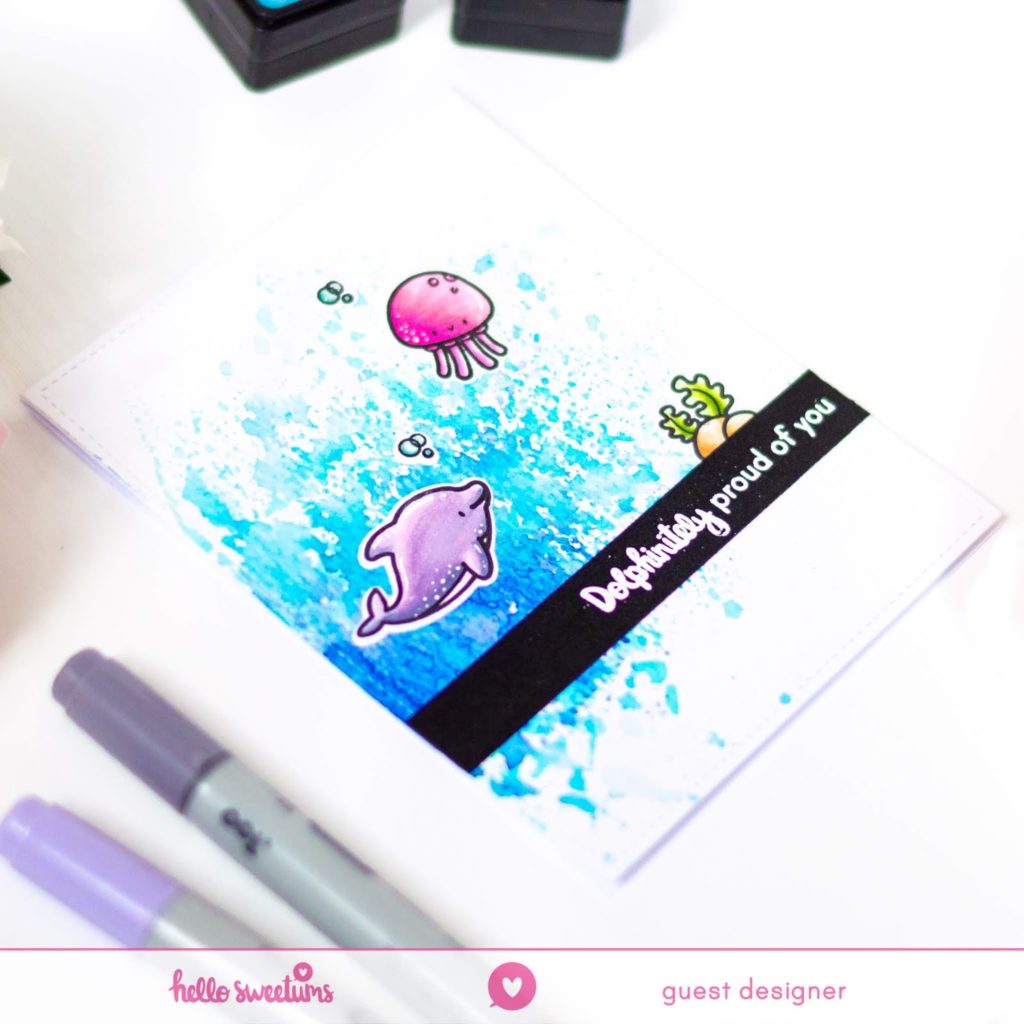
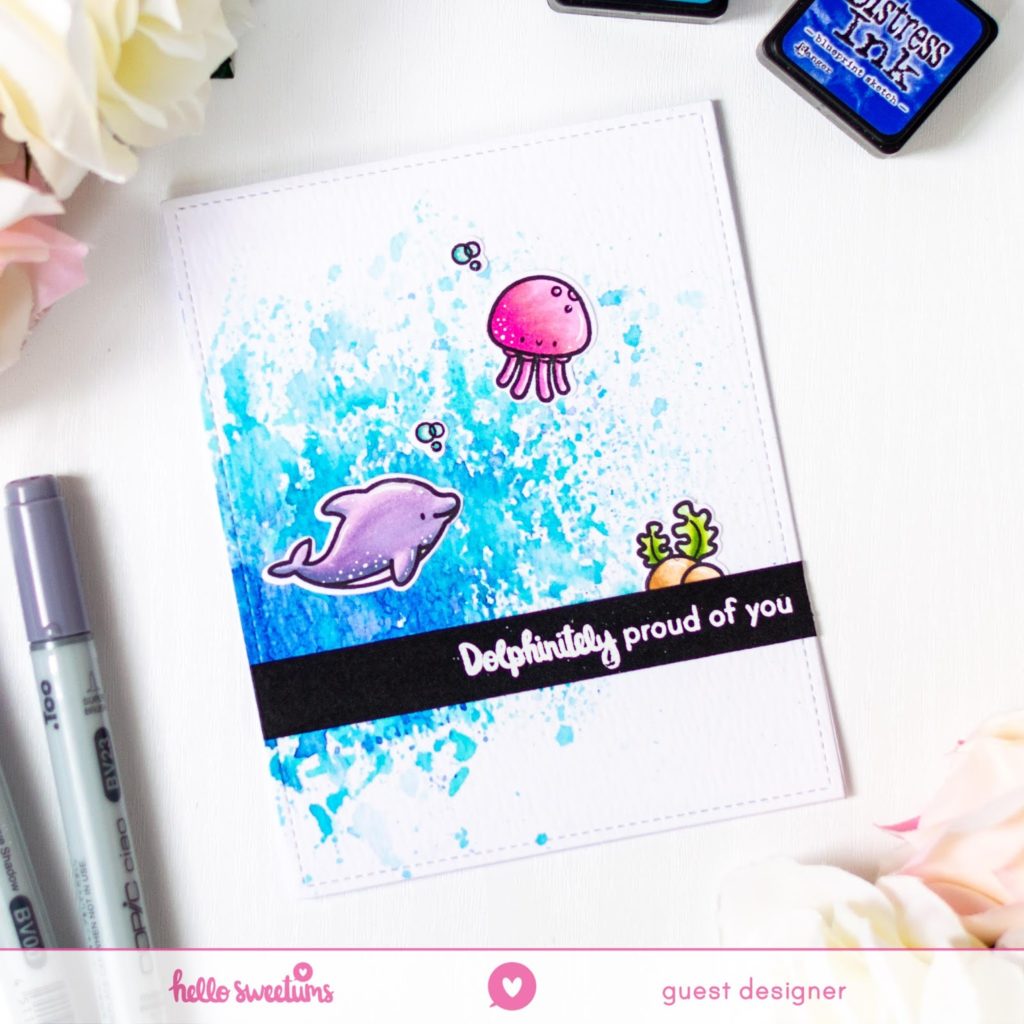
For my third and last card I decided to use Nuvo Shimmer Powders. These are a water soluble product that, because of the mica powder contained in them, adds a fabulous shimmer to your projects! And, thanks to their granulation properties, they also add a ton of texture!
I started again from some Tim Holtz watercolor, previously cut at an A2 size with a stitched rectangle die. I then sprinkled my Nuvo Shimmer Powders on my background, mostly concentrating them on the bottom left area. I used Atlantis Burst, Blue Blitz and Solar Flare. I spritzed them with water from a Distress Sprayer and let the water do its magic.
Once everything was dry, I glued my sentiment strip and my images to the card front, and that finished off card number three.
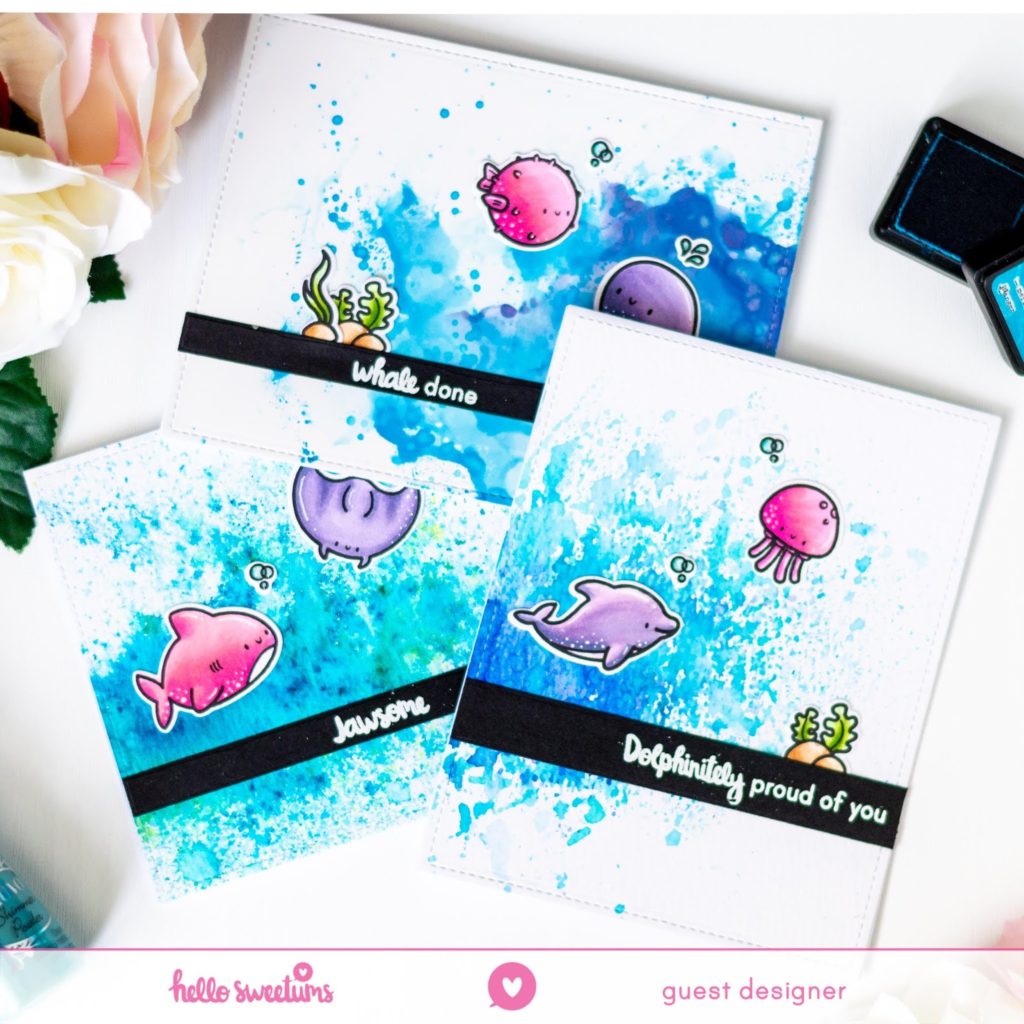
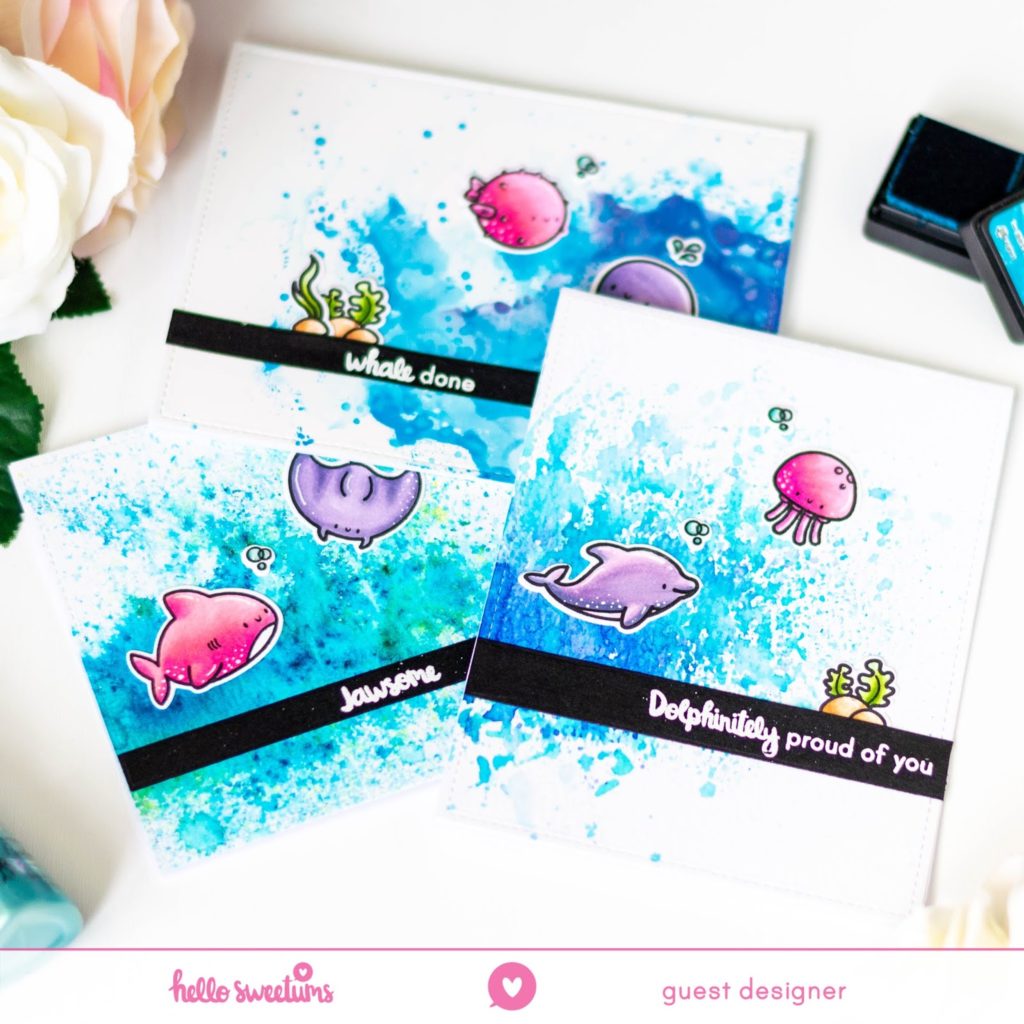
Let’s have another look at these cute cards – I LOVE the adorable critters in the Hello Sweetums Oceans of Encouragement stamp set! They really bring a smile to my face! Which one is your favorite?
And that’s it for today! I really hope you enjoyed this cardmaking inspiration with the Hello Sweetums Oceans of Encouragement stamp set! A big thank you to Angie for having me as a guest designer, and to you all for stopping by! Have a wonderful day!


Comments
Thanks for the tips,they're gorgeous cards x
Wow bellissime card!! Bravaaaa💗