

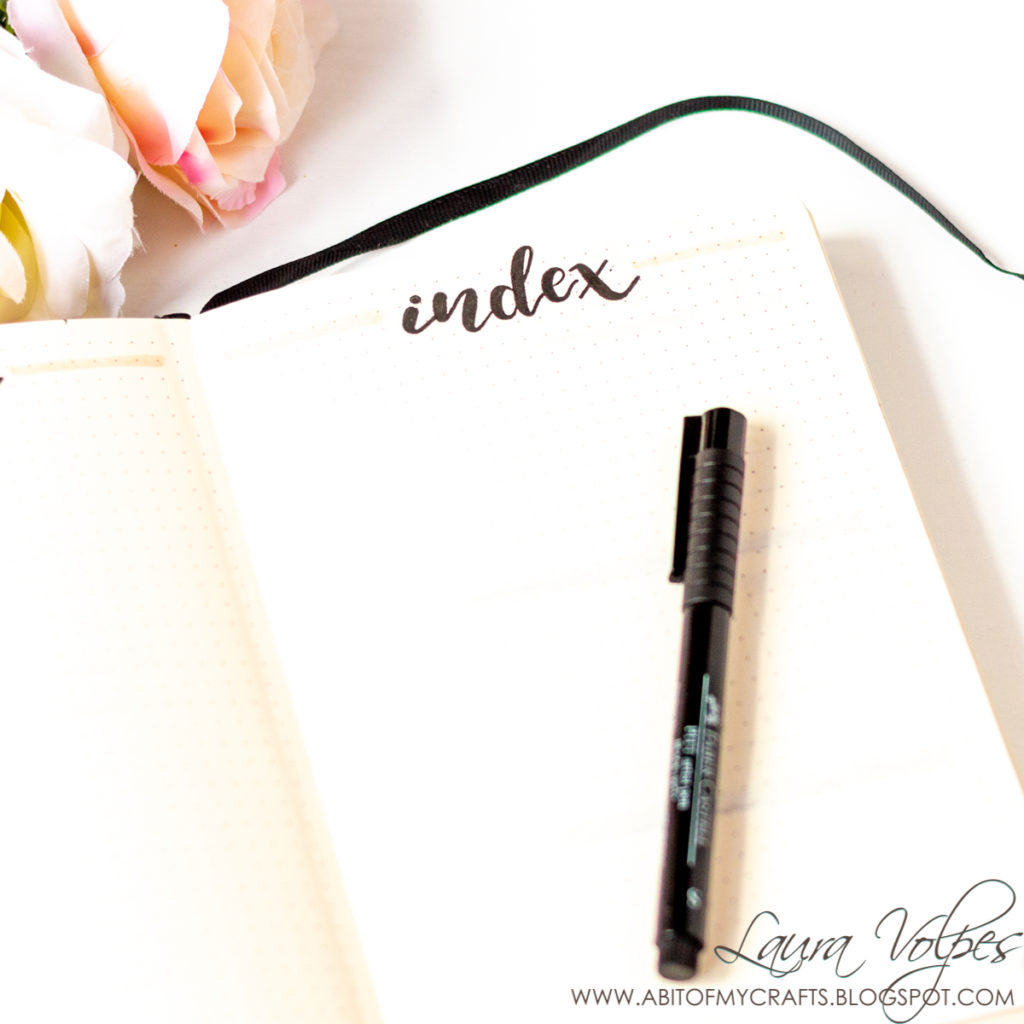
Hi everyone! Today I am back with something really new for my blog and YouTube channel…I have been looking for ways to stay organized and keep track of my habits and mood as well, and Bullet Journaling was just the perfect solution!
I love how you can customize your journal based on your needs, compared to a pre-set planner, and I also love the artistic aspect of it.
So I decided to give it a try and, because I love sharing my creative journey with you, I decided to film a video about the setup of my very first bullet journal!
If you are not familiar with the system, you can read more here 🙂 I might make a post or a video in the future where I break down the method behind this type of planner.
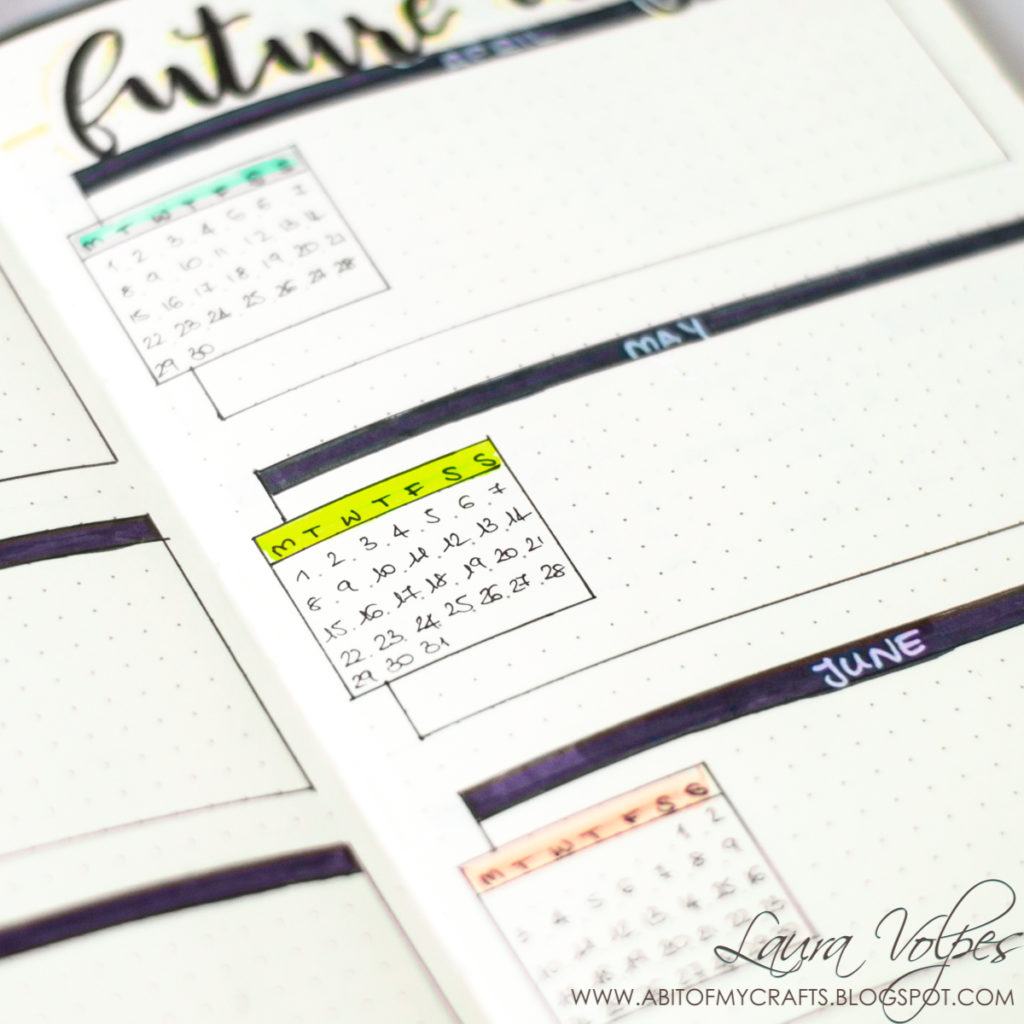
After the index, that you saw in the picture above, I started setting up my future log. This is basically a yearly calendar, where I will keep track of the most relevant events.
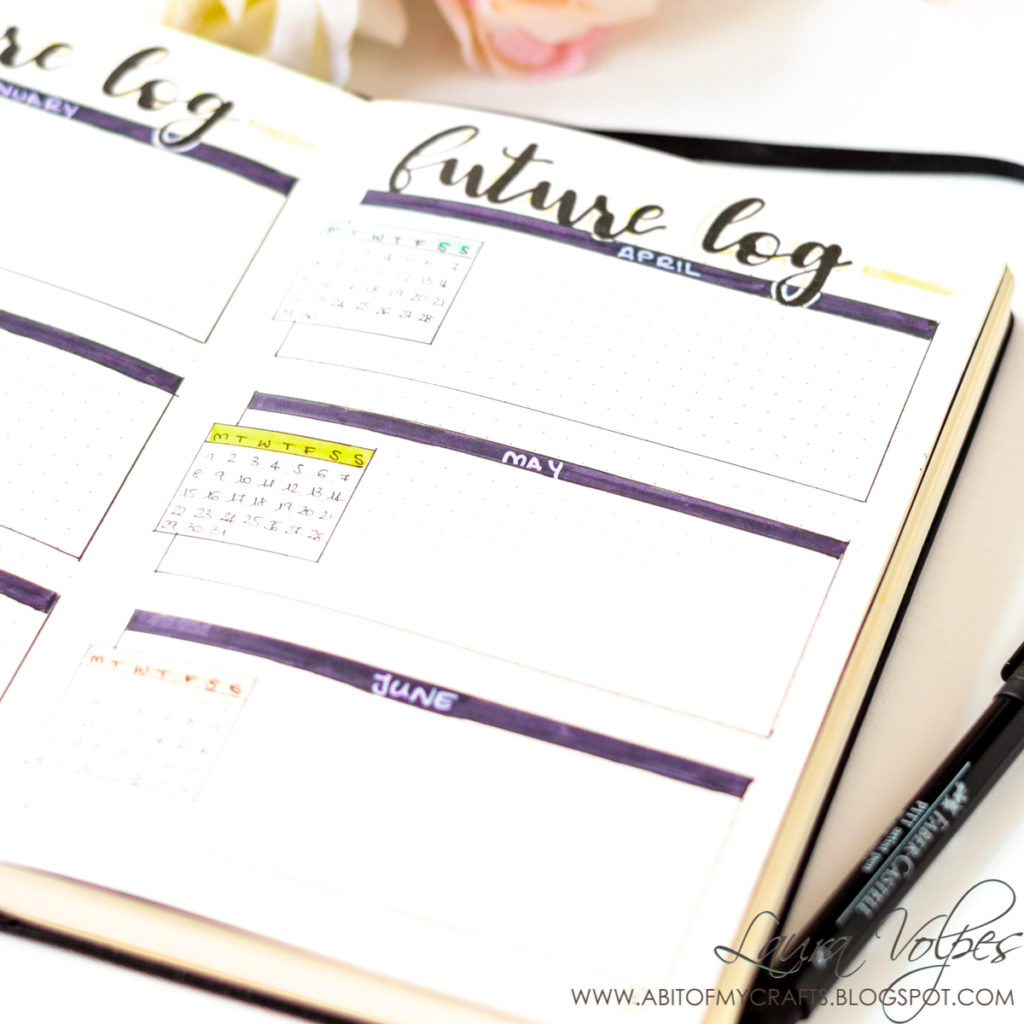
I do wish I had such a beautiful hand lettering, but I am still learning, so I used stamps instead. These one in particular are by Create a Smile Stamps and I just love the style of this font. I used them to stamp the page titles with Versafine Onyx Black ink (beware of smudges!), and then I added some details with my Marvy Uchida Dual Tip markers in the Pastel set.
The larger boxes measure 25 squares across by 10 down, and for each month I have a smaller box which is 7 squares across. The number of squares down depends on the number of weeks in the month. May, for example, had 5 weeks, so the box measures 7 by 6 squares, the extra grid being the one with the initials of the week days.
I decorated the boxes adding a black row at the top, where I wrote the title with a Sakura White Gelly Roll pen. For the smaller boxed I used again my Marvy Uchida markers, following rainbow order.
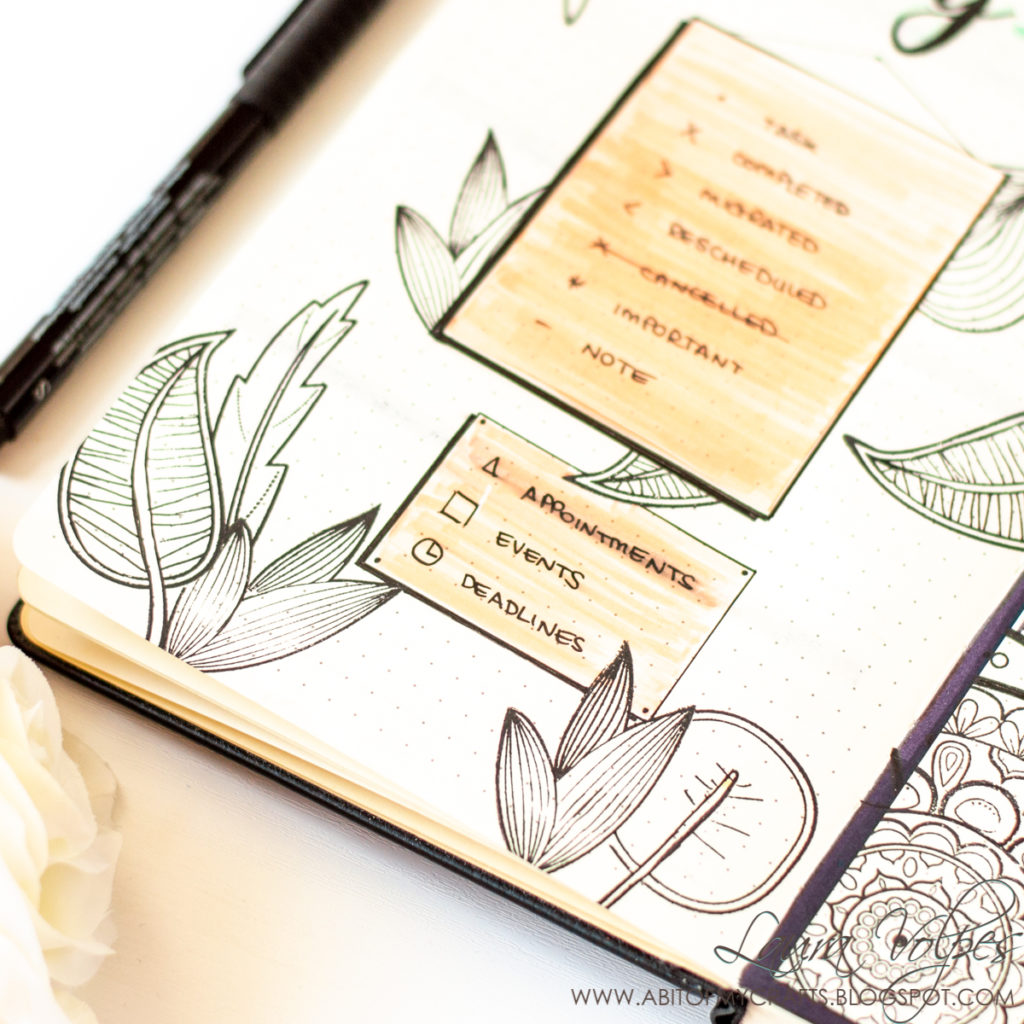
Next I have my key page. Here is where I have listed all the symbols that I will be using on my pages to mark tasks, events, appointments, and so on.
I decorated the page with more stamps by Create a Smile Stamps (unfortunately those are retired – sorry!- , but here you can see their selection of floral stamps.)
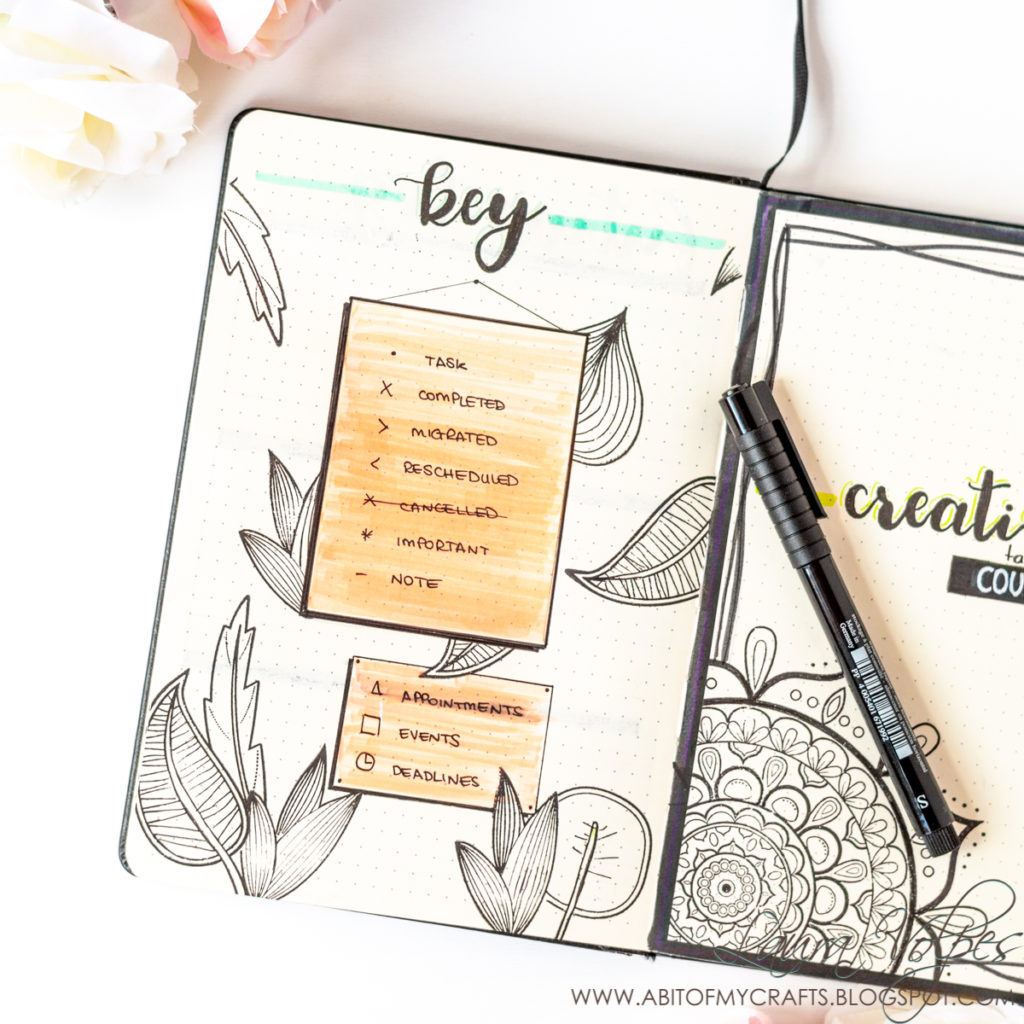
I wanted it to look as if the key was a picture hanging on the wall, so I drew two rectangles. The large one is 13 across by 17 down, and the smaller one is 11 across by 7 down.
There were a few accidents on this page, and I am going to show you how I fixed them in the video that you will find at the end of this post.
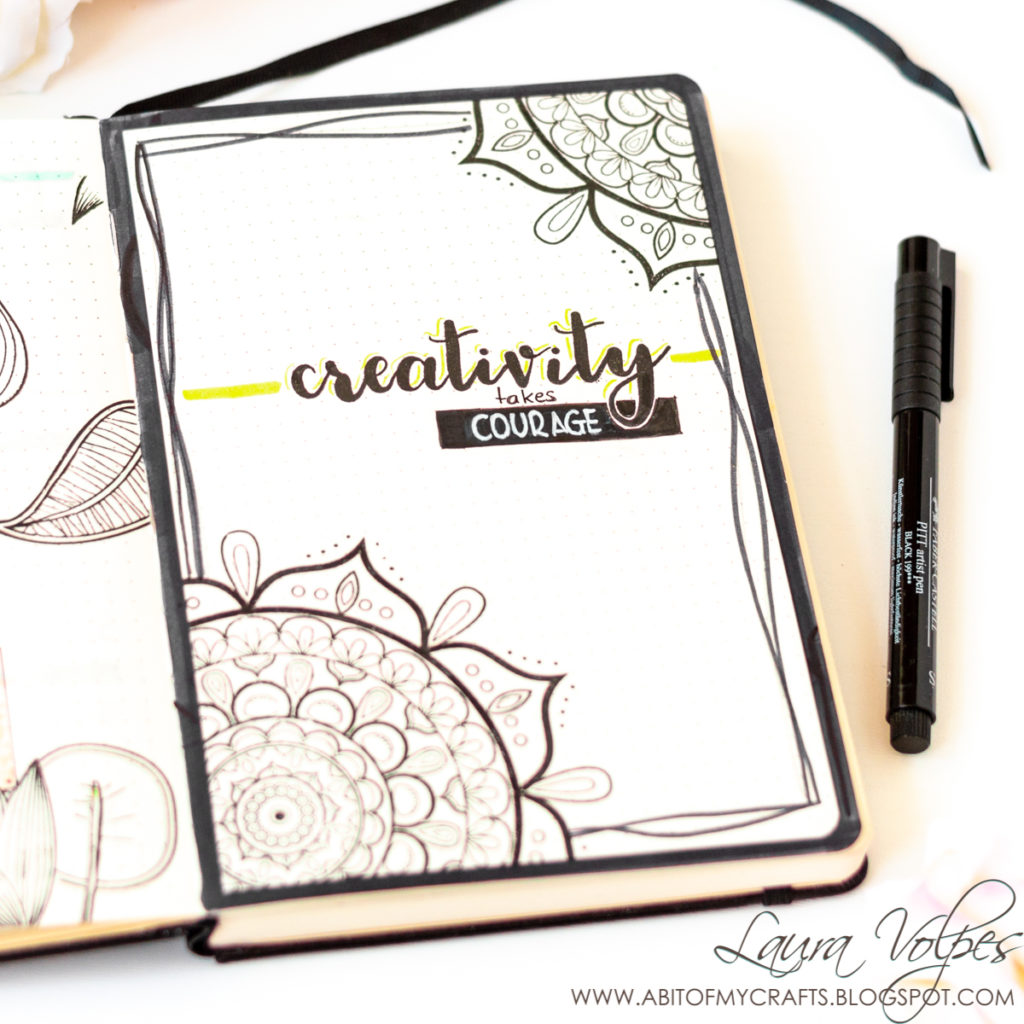
The next page is a decorative page, with a quote that at the time really spoke to me. I had attempted to draw something, actually, but I didn’t like it at all. So I created this page with more stamps by Create a Smile Stamps and glued it on top. I did keep the drawing footage in the video, so there you can see what I drew…and let me know if covering it up was the right decision! 😛
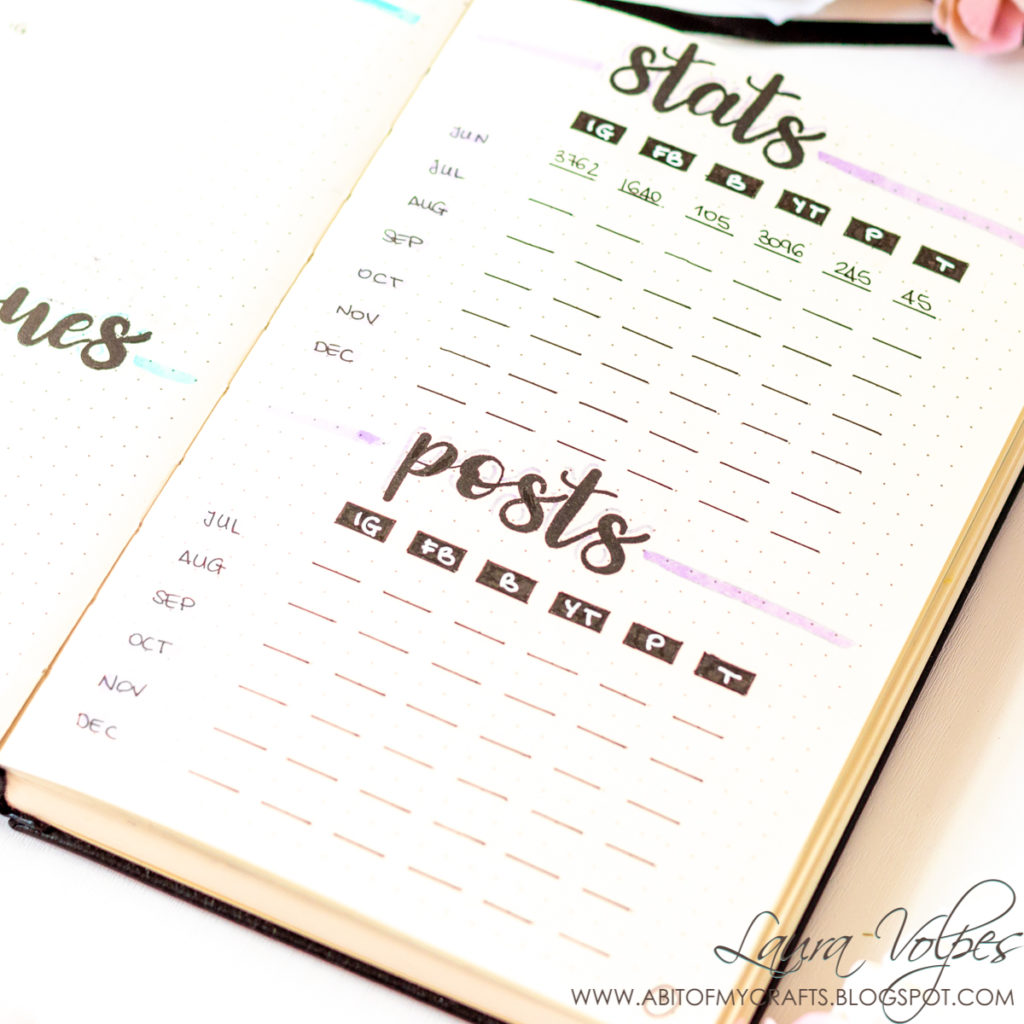
Next, I have a page where I will be tracking my goals and my milestones. These involve my social media growth, improving my creative skills and my lifestyle.
Under the goals I decided to add a section for milestones. It will be nice to look back and see what I’ll have achieved. 🙂

I also want to keep track of how I am doing with social media, and how active I am on each platform. So I am going to keep track of how many followers I gain and how many posts I share each month on my blog, YouTube channel, as well as Instagram, Facebook, Pinterest and Twitter profiles.
In my montlhy spreads I will track these same stats, and at the end of each month I will come back and fill this page in.
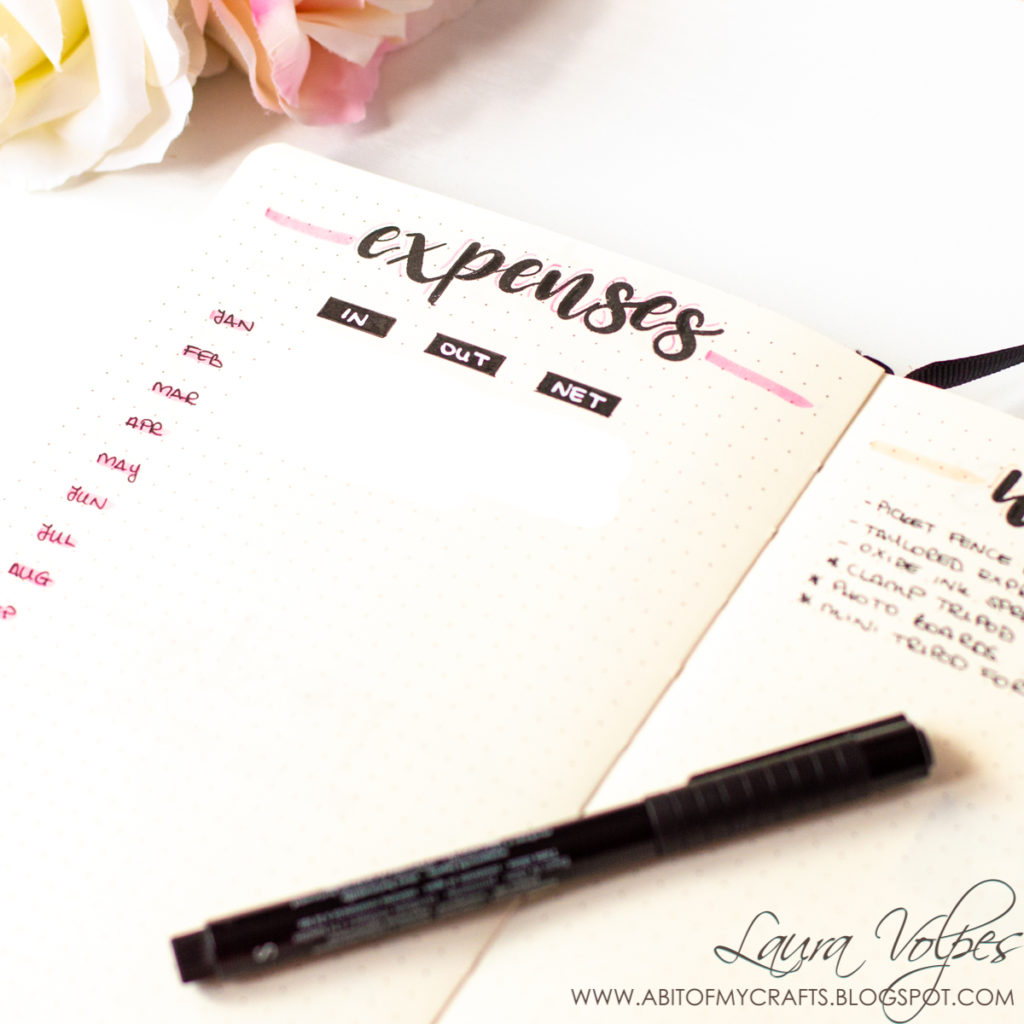
Next I have a spread to keep track of my expenses. Similarly to what I will do with my social media stats, I will have something like this on my monthly pages, too.
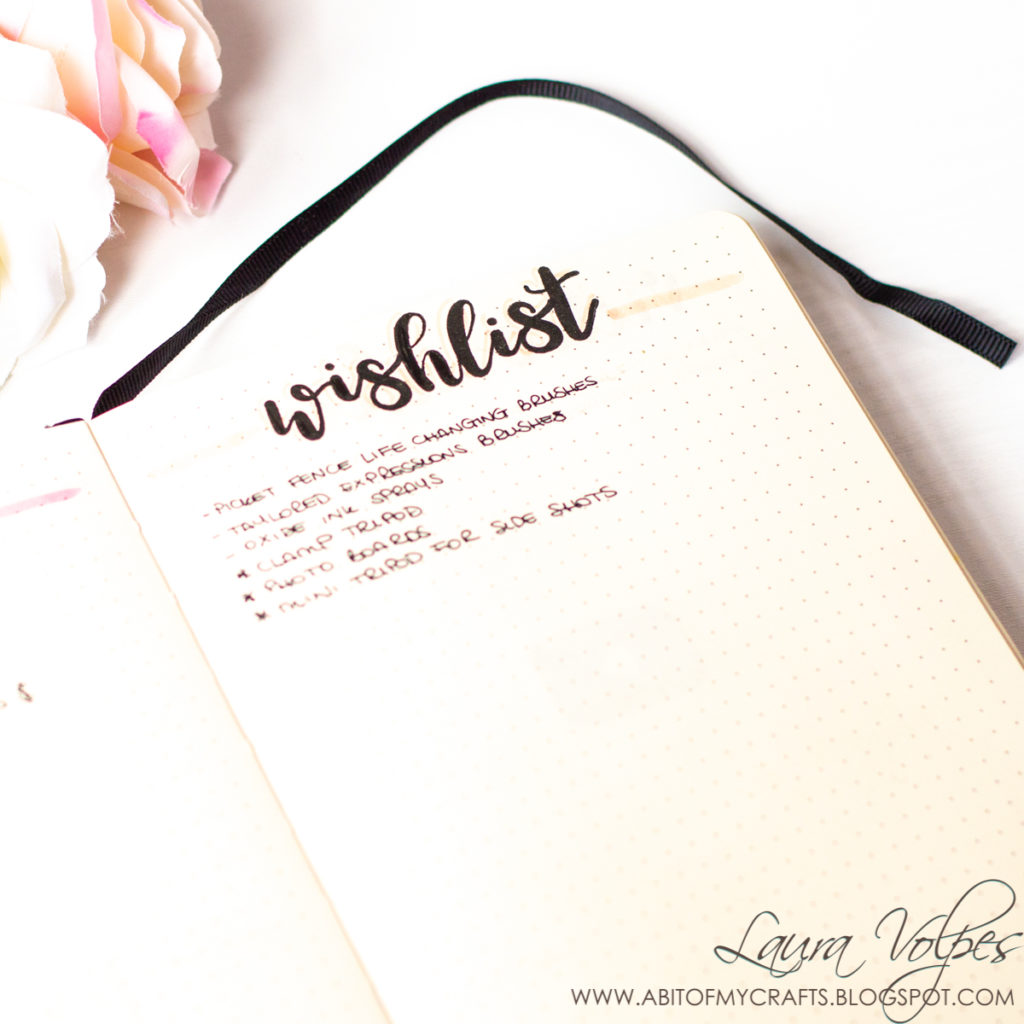
How appropriate is it to have a wishlist just right next to your expense page? 😀
I think this page is self explanatory…let’s just say that having one page only for my wishlist from now til the end of the year is quite optimistic!
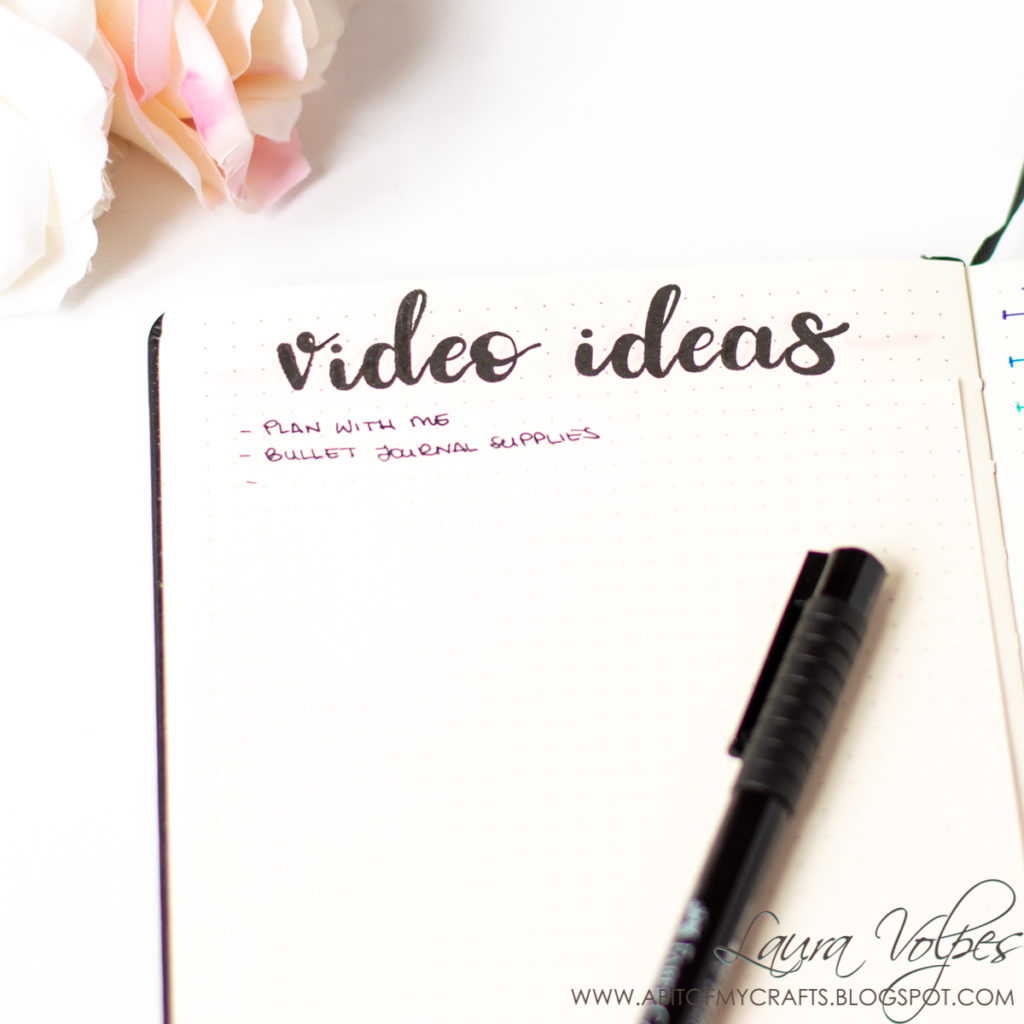
I do not have a master to do list in my yearly set up – I felt it was going to be overwhelming, and that it would be better to keep it in my monthly spreads only.
I did add a page for video ideas, though, but I think I will need more. 🙂 If I do, or if I decide to start adding collections like books or movies, I can always add that at the end of the planner. And, because I number my pages and write everything in the index, I always know where things are.
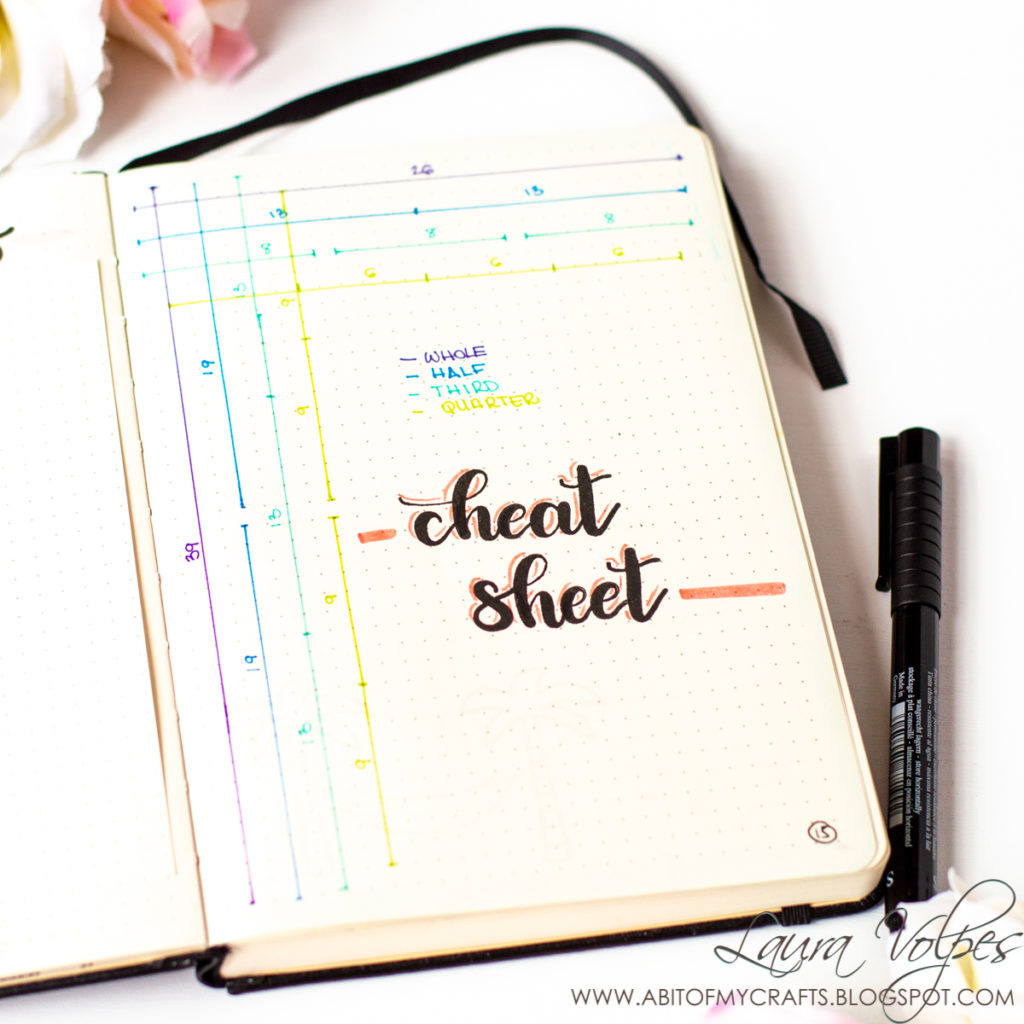
My last page is a cheat sheet – I got the idea from Amanda Rachlee and it is very clever!
It is a reference chart with grid measurements that will help you remember the size of you page, and how many squares correspond to half a page, a third of a page and so on.
I created a color code using my Stabilo fineliners, as I find it easier to reference it this way.
And this was my very essential Bullet Journal setup for 2019! I know that there are a lot of great artists out there with incredible journals and all kinds of spreads…I certainly want to improve my skills and possibly add more pages to the journal, but I also wanted to keep it simple now that I am just starting. I do hope that this will be helpful to BuJo beginners who are looking for a minimal and functional setup.
If you want to watch me setup the journal, there is also a video for you! Please, let me know what you think and if you would like to see more!
Before I go I should also mention a few amazing Bullet Journaling channels that I have been binge watching before diving in and starting my own. I will list them below and I definitely suggest that you check them out!
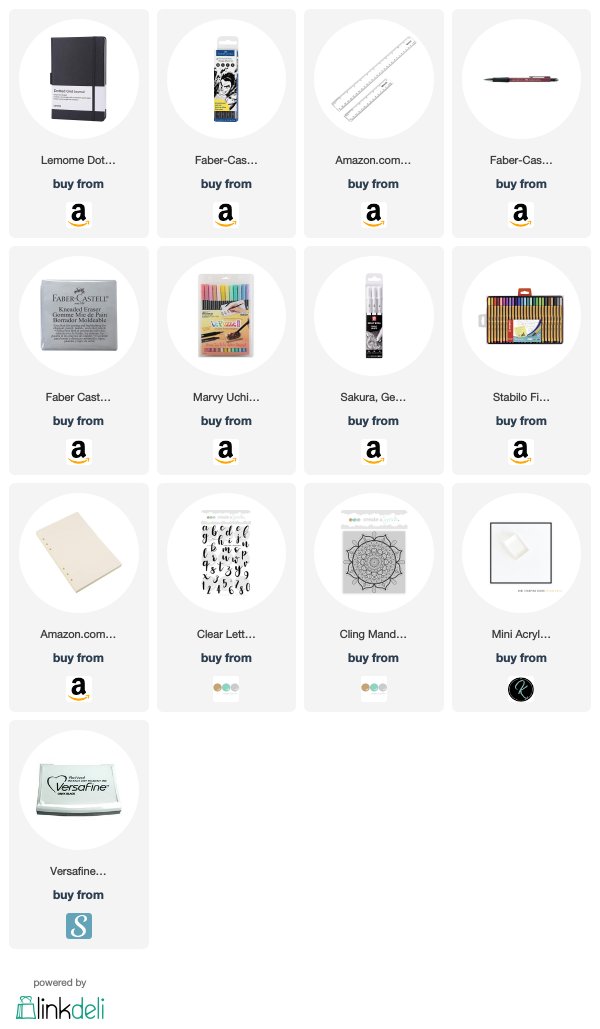
When possible, affiliated links are used at no additional cost to you. This means that if you make a purchase through one of these links, I will get a small commission at no additional cost to you. The money I earn this way goes towards running this blog and my YouTube channel. Thank you for supporting my creative journey! 💖


Comments
You've brought this out at amazingly the right time for me. I have just started looking into journaling but couldn't find exactly what I needed preprinted. Very interested to keep watching this series x Thank you x