Privacy & Cookies: This site uses cookies. By continuing to use this website, you agree to their use. To find out more, including how to control cookies, see here: Cookie Policy
Hi everyone! Today I am back with two cards and a very special post, because we are now celebrating two years since the Facebook group Carmaking Italia (CMI) was born! I have been a member of the group for about a year and was asked to be a moderator a few months ago, and I really love being a part of it! It’s all about sharing the love for cardmaking and for handmade kindness.
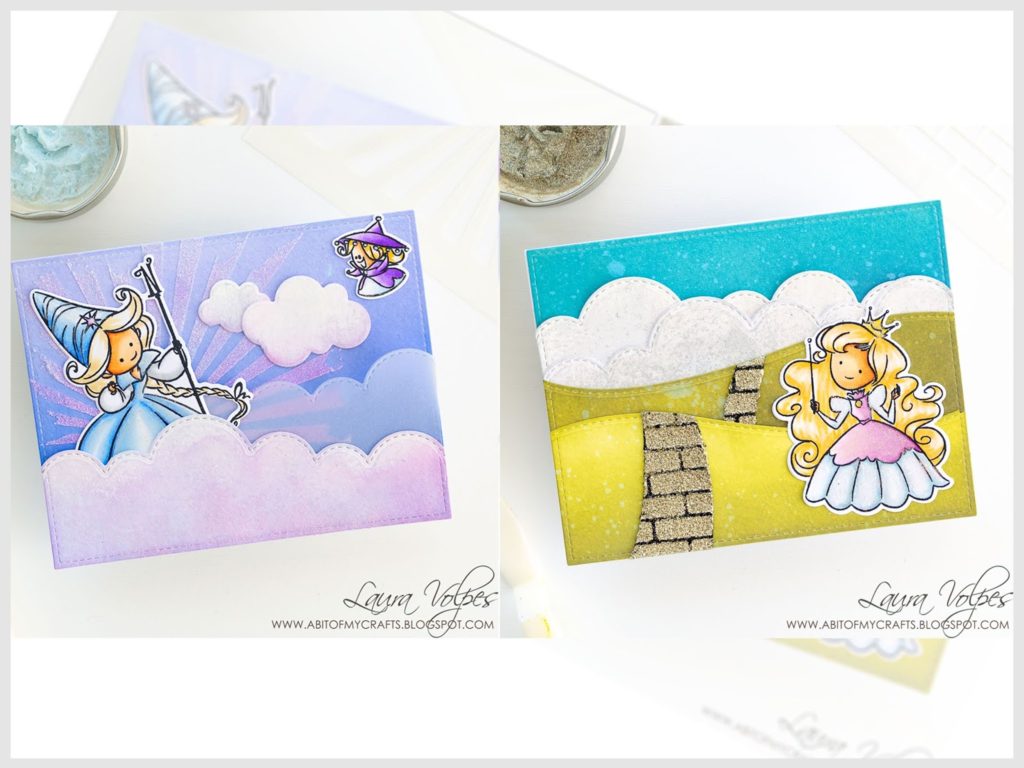
And as part of the celebrations for CMI’s anniversay I had the chance to play with some beautiful products by Tommy Art and created two cards and a video tutorial, that I will share in today’s post.
The products I tried are the Tommy Art Brilli Gel, which are a tinted gel medium which contains some really sparkly glitter, and the Timbrillo, which is a perlescent, water soluble medium with silver glitter in it. Make sure to watch the video below, where I show these products and how I used them in today’s cards! But first let’s have a look at the card making process.
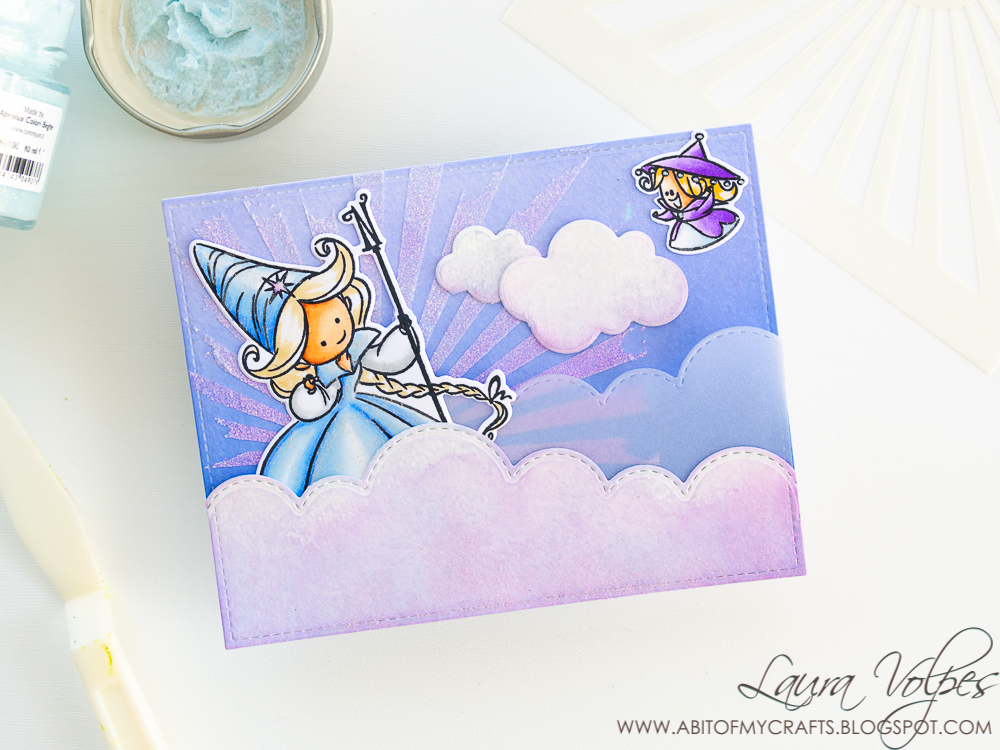
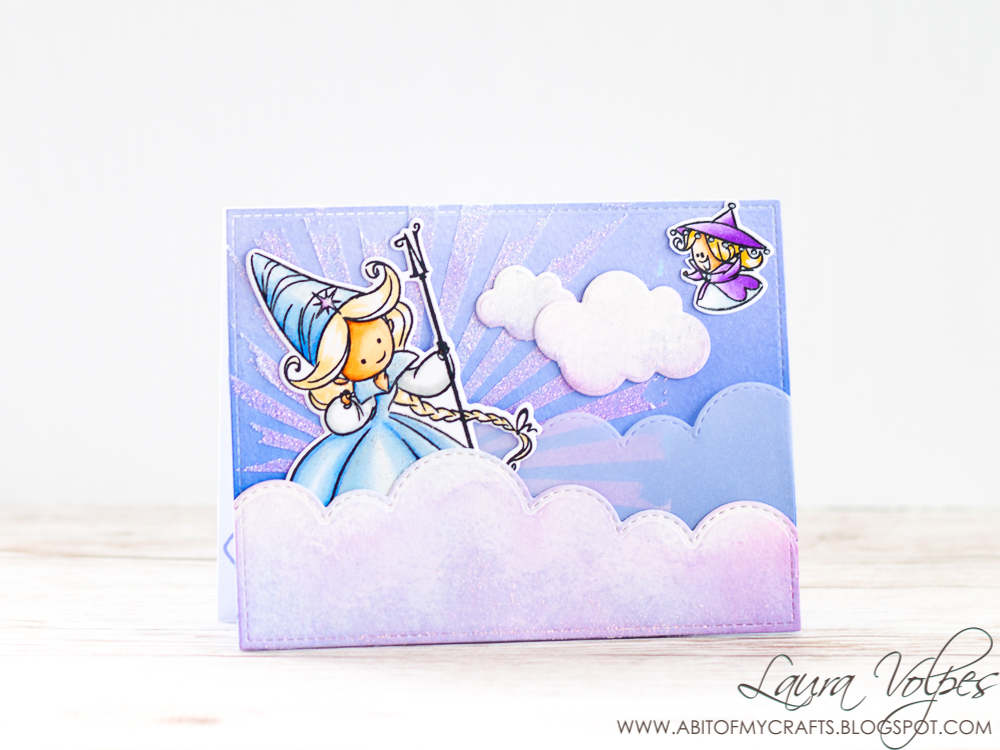
For the first card I started off by ink blending Distress Oxides in Blueprint Sketch and Shaded Lilac over some watercolor cardstock. In order to cut panel to a standard A2 size I used a stitched rectangle die by Heffy Doodle. I then used the My Favorite Things Radiating Rays stencil to apply the Brilli Gel in the color Luce, which has a light blue tint to it and added some beautiful sparkle to the background.
I then die cut a cloud border and some individual clouds using dies by Mama Elephant and Lawn Fawn. I added some shading using Distress Oxide in Shaded Lilac and Picked Raspberry, and used the same Brilli Gel in the color Luce to add shimmer to the clouds. I diluted it with a bit of water and used a brush to distribute the product on the clouds. And this added even more sparkle to my card.
The images I used are from the Impronte d’Autore Wizard of Oz series. I stamped them with Memento Tuxedo Black ink on some Neenah Solar White cardstock and colored them with Spectrum Noir markers. To add some shimmer to the images as well I used the Timbrillo: I diluted it with a bit of water and brushed it over the clothes of Glinda and of the munchkin.
To finish off the card I stamped a sentiment on the inside (it reads somewhere over the rainbow the sky is blue and impossible dreams come true) and the fairy as well, using Distress Oxides in Blueprint Sketch and Shaded Lilac, to match the card front.
And this is card number one 🙂
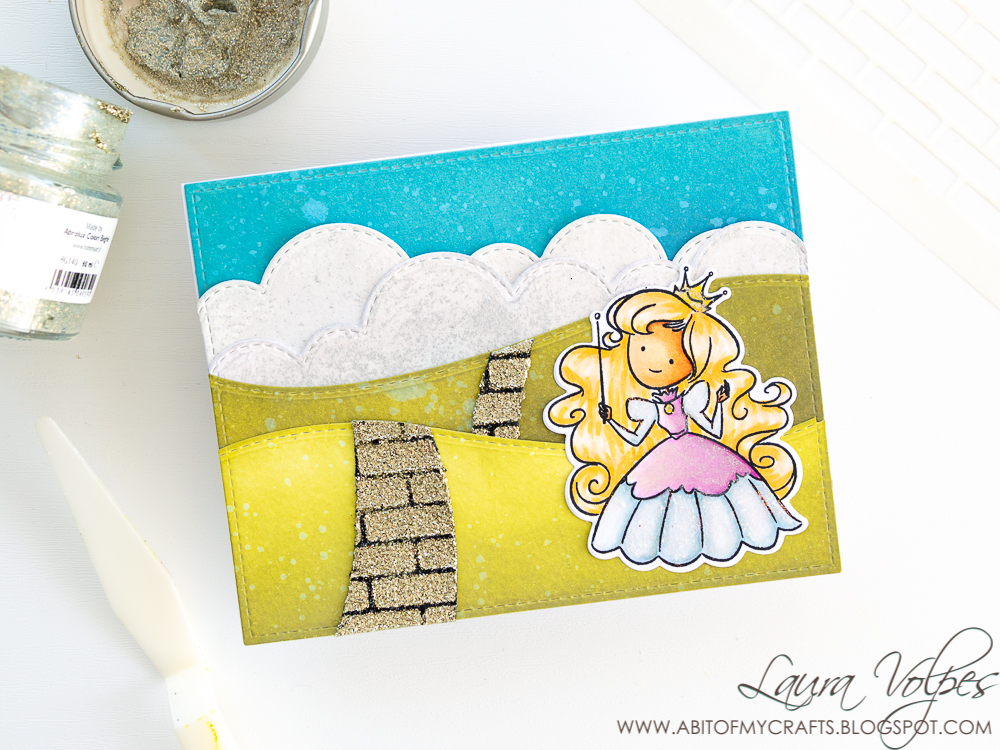
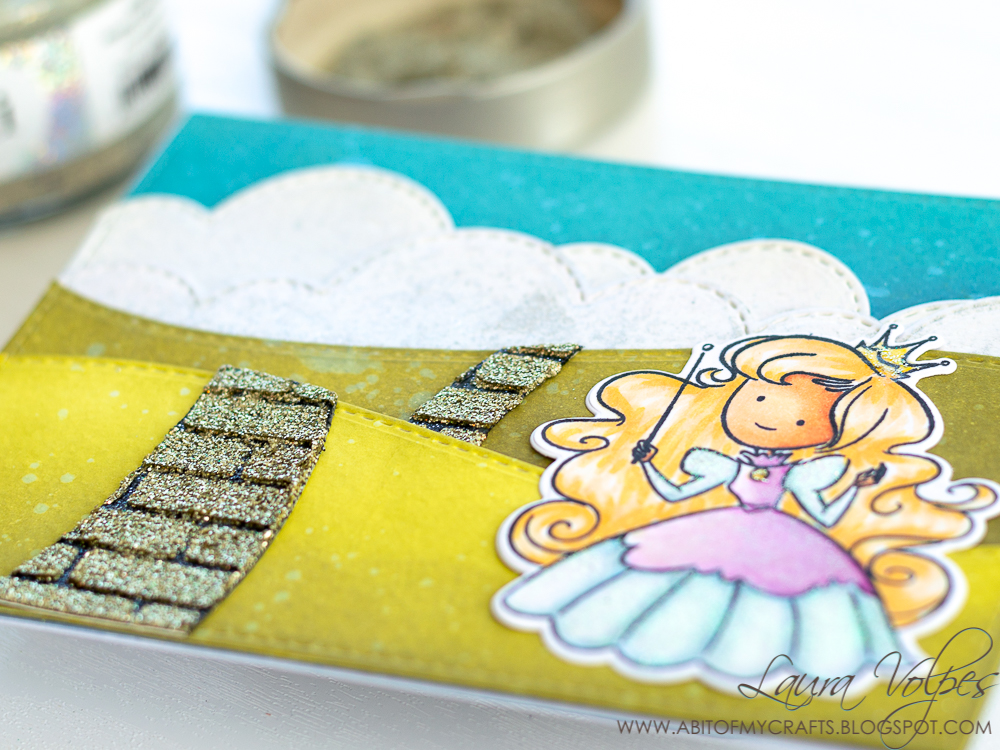
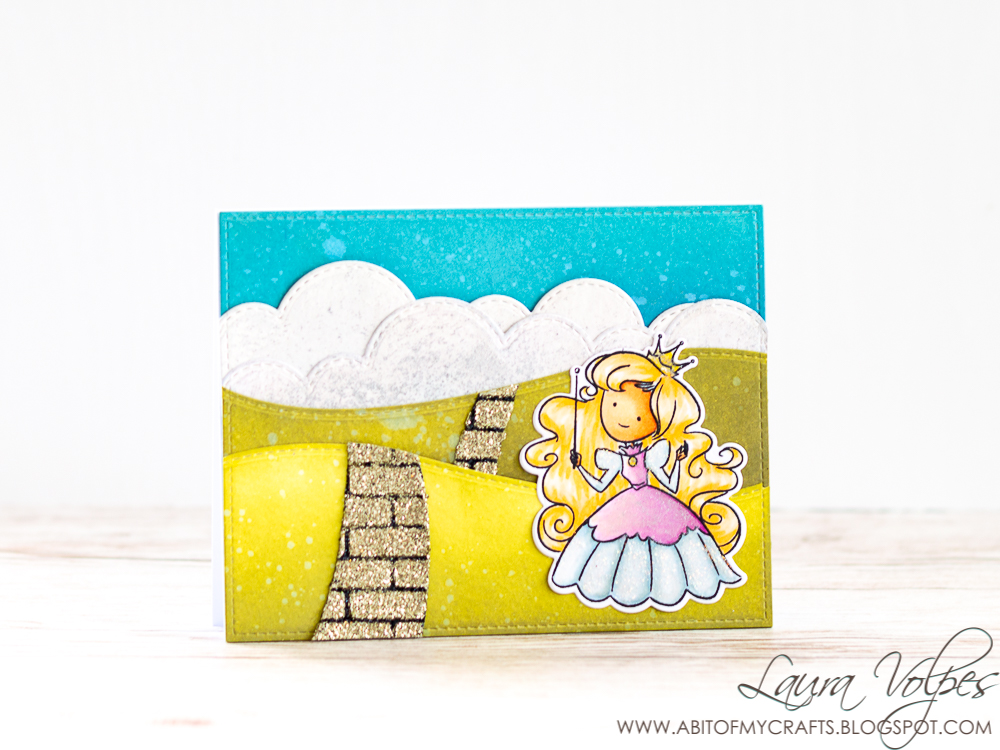
For the second card I created a Wizard of Oz inspired scene. As a first step I created my yellow brick road. I die cut two road strips using some hillside dies by Mama Elephant, I covered them in Distress Oxide in Black Soot and then I coated them with the Brilli Gel in Cristalli di Carbone (Coal Crystals), which is a gorgeous black glimmer paste. Once that layer was dry I used the English Brick Wall stencil by My Favorite Things and the Brilli Gel in Polvere di Fata (Fairy Dust) to add some golden bricks to the road. I left these die cuts to dry and started working on my scene.
I used the Landscape Trio dies by Mama Elephant to cut the hills and the cloud border, and the Heffy Doodle Clover Frames Dies to cut the panel for the sky. I then blended Distress Oxide in Peeled Paint and Forest Moss over the hills, and Faded Jeans and Broken China over the sky. I added water droplets for a fun look.
For the clouds I used the Landscape Trio dies by Mama Elephant, I added shading with Distress Oxide in Shaded Lilac, and some gorgeous shimmer with the Timbrillo by Tommy art. I diluted it with water and used a large, flat brush to distribute it over the clouds.
I then stamped and colored another image from the Impronte d’Autore Wizard of Oz series, and used more of the Brilli Gel and the Timbrillo to add shimmer to the clothes and the crown of this sweet fairy.
I decorated the inside of the card by stamping the fairy and the sentiment, which reads “follow the yellow brick road”.
And that’s the second card for today. If you want to have a closer look at the cardmaking process and at how beautiful and shimmery the products I used today are, you can watch the video down below! And don’t forget to leave a comment and a thumbs up if you liked the video, and to subscribe to my channel if you want to see more from me 🙂 Thank you very much for your support!
And that’s it for today! I really hope you guys enjoyed this post! I will be back soon with another fun project, and, in the meantime, I wish you all a great day!
Laura
List of Supplies
Card 1: Tommy Art Brilli Gel – Luce Tommy Art Timbrillo Impronte d’Autore La magia e’ Credere Clear Stamp Set & Coordinating Dies Impronte d’Autore Felicità Clear Stamp Set & Coordinating Dies
Mama Elephant Landscape Trio Dies
Heffy Doodle Clover Frames Dies
Lawn Fawn Puffy Clouds Dies
My Favorite Things Radiating Rays Stencil
Spectrum Noir Markers
Memento Tuxedo Black Ink
Neenah Solar White 110 lb Cardstock
Windsor and Newton Cotman Watercolor Cardstock
Distress Oxides – Blueprint Sketch, Shaded Lilac
Mondi Color Copy 300gsm White Cardstock
Spatula
Paintbrushes
Double Sided Adhesive
Nuvo Deluxe Adhesive
WeR Memory Keepers Score Board
Tonic Studios Maxi Guillotine Trimmer
Sizzix Big Shot Express
Sizzix Sideckick
Card 2:
Tommy Art Brilli Gel – Cristalli di Carbone Tommy Art Brilli Gel – Polvere di Fata Tommy Art Brilli Gel – Luce Tommy Art Timbrillo Impronte d’Autore Felicità Clear Stamp Set & Coordinating Dies
fabulous cards Laura, love that glitter and the wonderful scenes you have created. Thanks so much for sharing all the details. Love those stamp sets, must go check and see if they have come out with english versions yet (I live in hope). they are so unique and beautiful looking. hugs Aileen
Thank you very much, Aileen! The sets are now available in English as mounted or unmounted rubber stamps. If you decide to order them and you do it from outside Europe you can do it by sending them an email with the items you wish to purchase, so that they can calculate shipping costs and get back to you. 🙂


Comments
fabulous cards Laura, love that glitter and the wonderful scenes you have created. Thanks so much for sharing all the details. Love those stamp sets, must go check and see if they have come out with english versions yet (I live in hope). they are so unique and beautiful looking. hugs Aileen
Author
Thank you very much, Aileen! The sets are now available in English as mounted or unmounted rubber stamps. If you decide to order them and you do it from outside Europe you can do it by sending them an email with the items you wish to purchase, so that they can calculate shipping costs and get back to you. 🙂