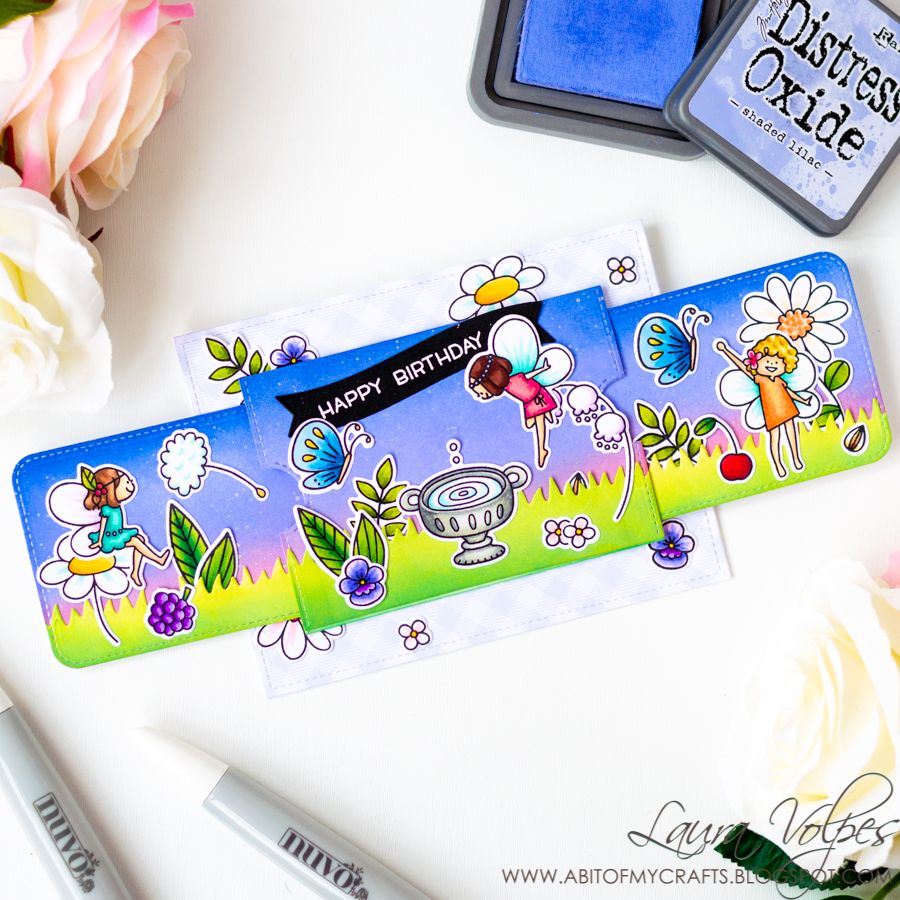
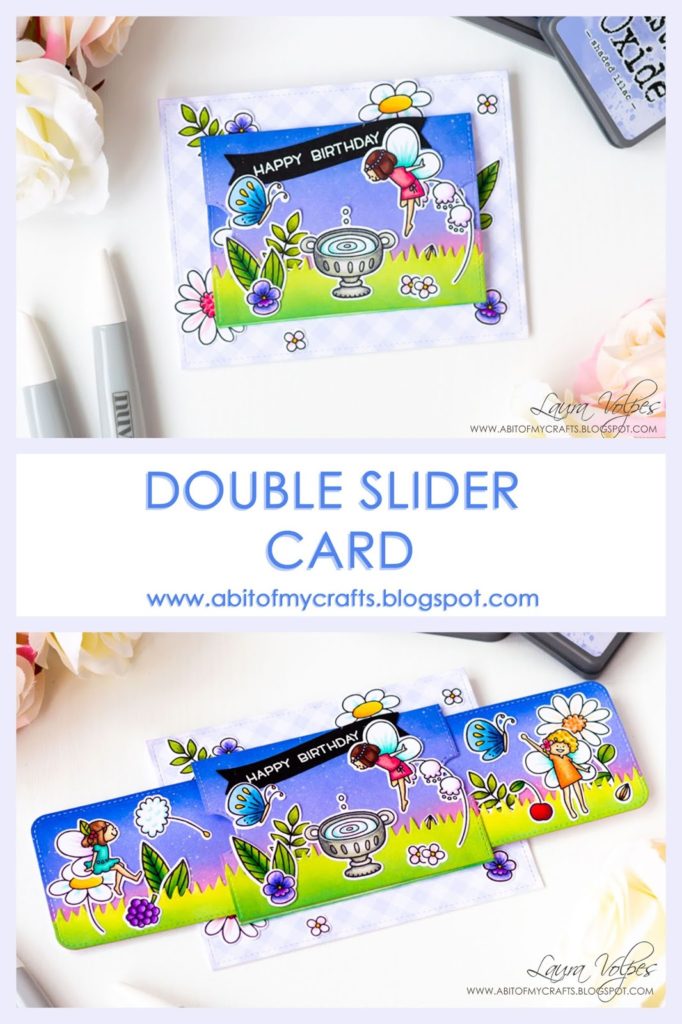
Hi everyone! Today I am really thrilled to be guesting on the Scrapbook.com Blog with a tutorial showing how to create a double slider card!
I love interactive cards, I think they are really fun and have such a wow effect! I also love scene cards, so today I paired the two for this cute and whimsical double slider!
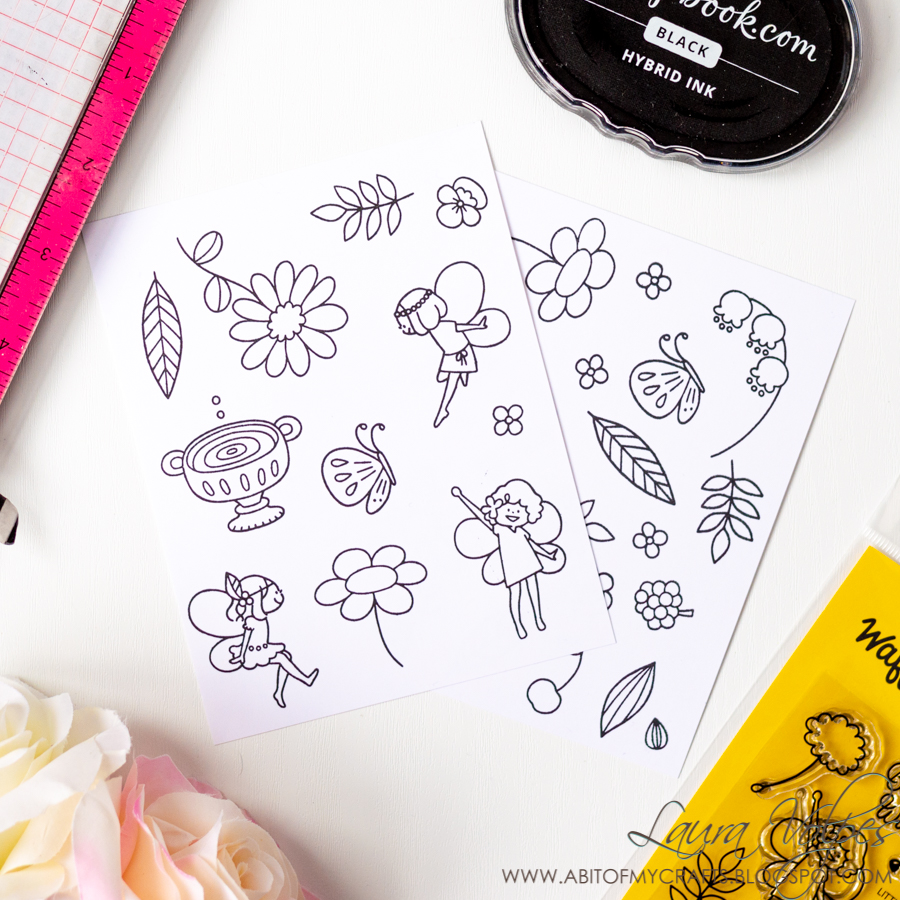
I started by stamping the images in the Waffle Flower Little Fairies stamp set. I used Scrapbook.com Premium Hybrid Black ink and Neenah Solar White card. I stamped quite a number of images because I wanted to have a nice and full scene, and I used my Mini MISTI to speed up my stamping.
For the coloring I used Nuvo Alcohol Markers. I went for some simple coloring and then die cut all the images with the Little Fairies coordinating dies and my Big Shot Express die cutting machine.
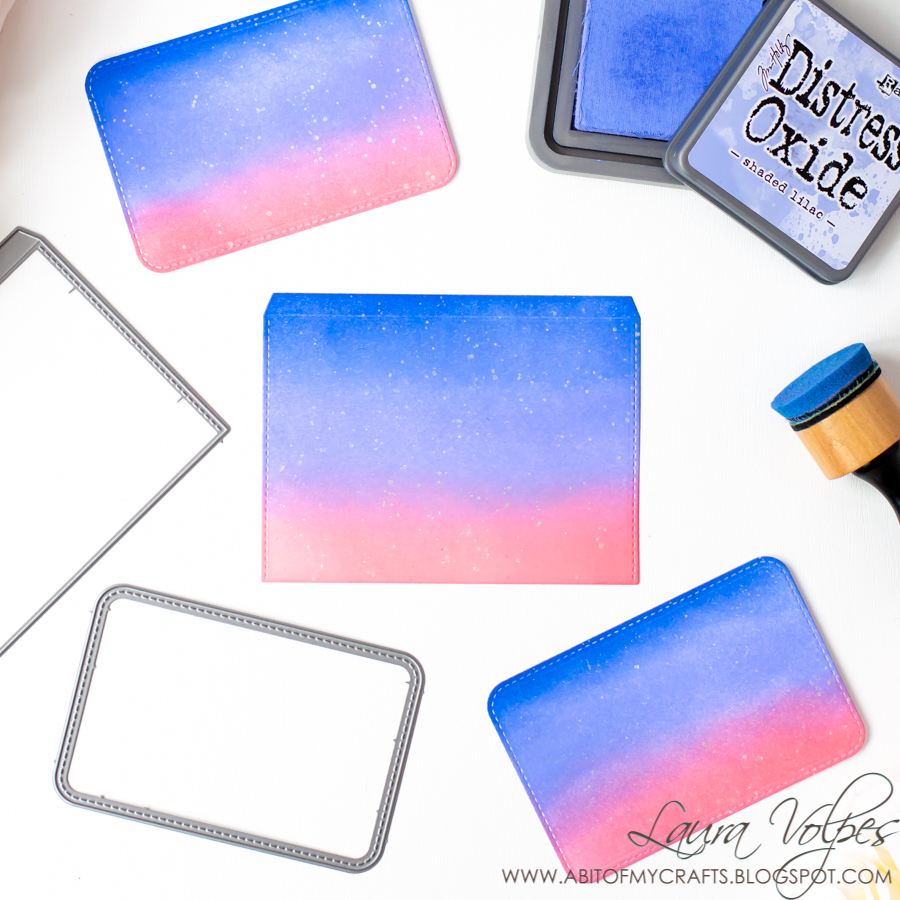
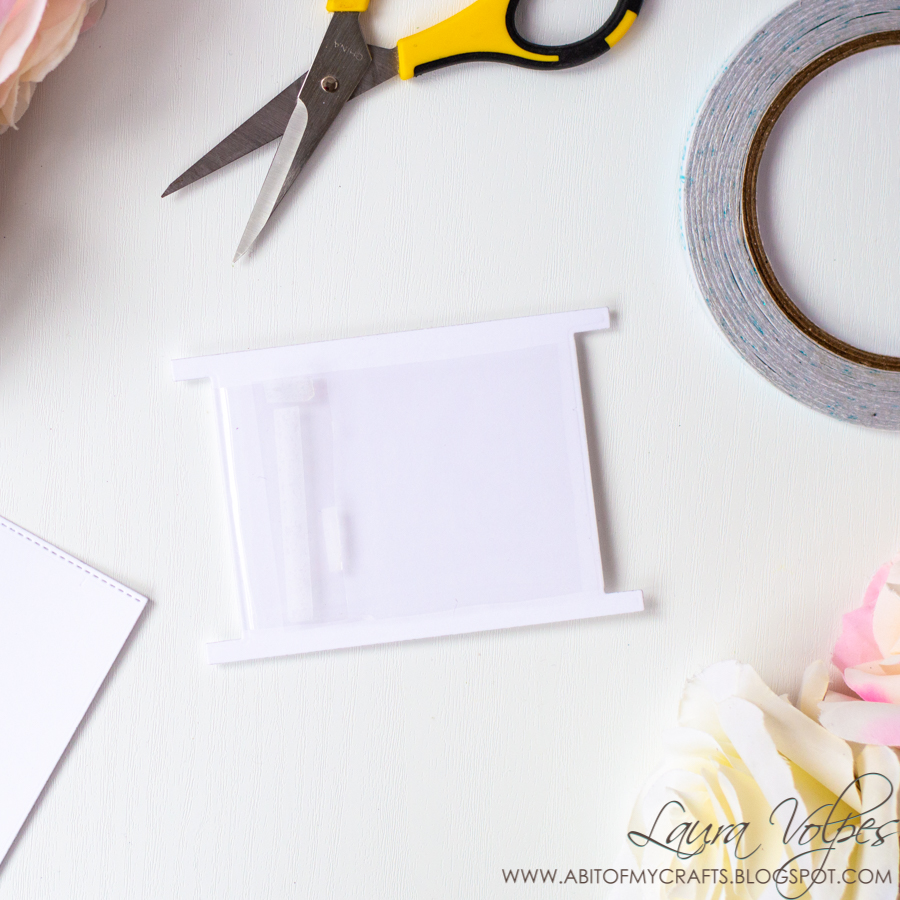
I then started working on my slider card. I used the
Lawn Fawn Double Slider Surprise dies to cut some more Neenah Solar White cardstock. The two rounded rectangles in the picture below will be the sides of my slider card, and the other die cut will be the central panel. This die set is really great – it makes creating slider cards
so easy!
I added some stars by diluting
Perfect Pearls in the color Perfect Pearl with some water, and creating droplets with a paintbrush.
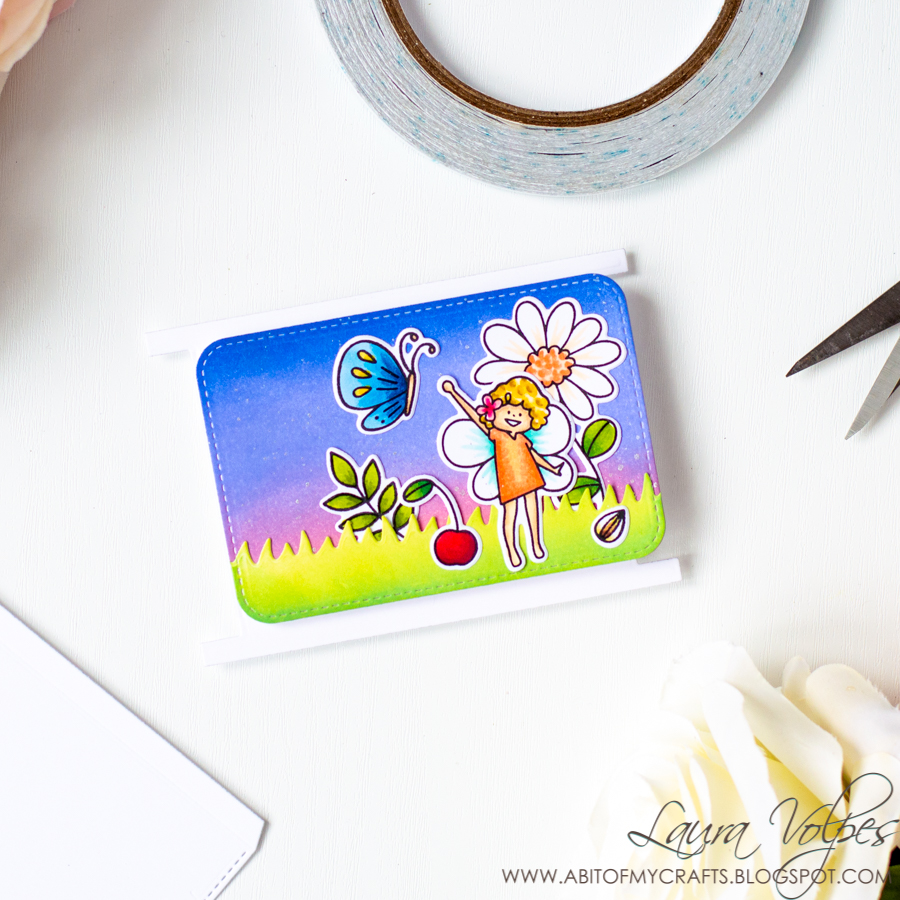
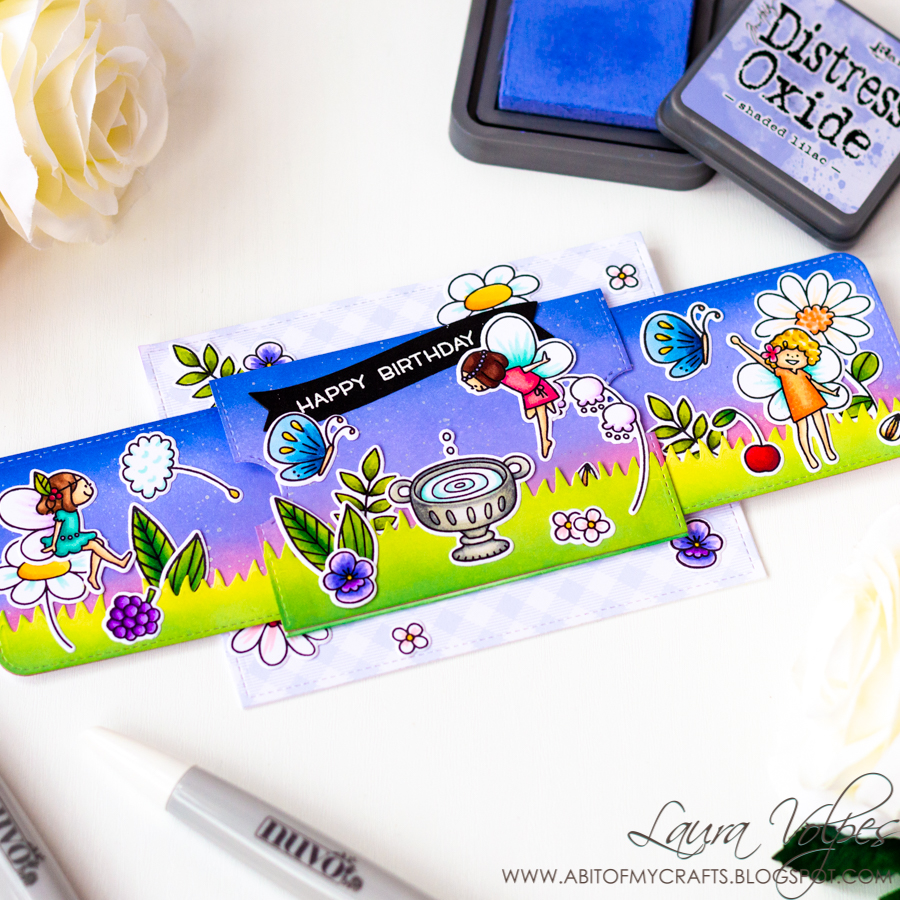
I then went ahead and assembled the scenes.
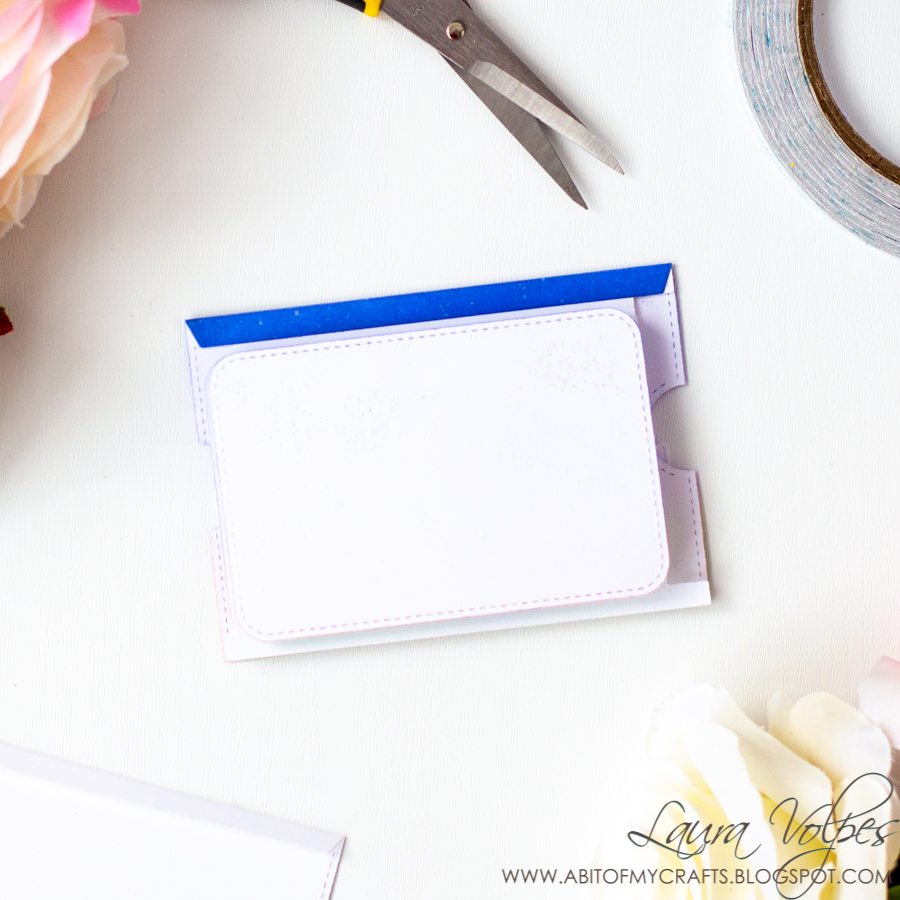
Before gluing everything down, I used one of the smaller dies in the Lawn Fawn Double Surprise to die cut two circular notches out of the central panel (see picture below).
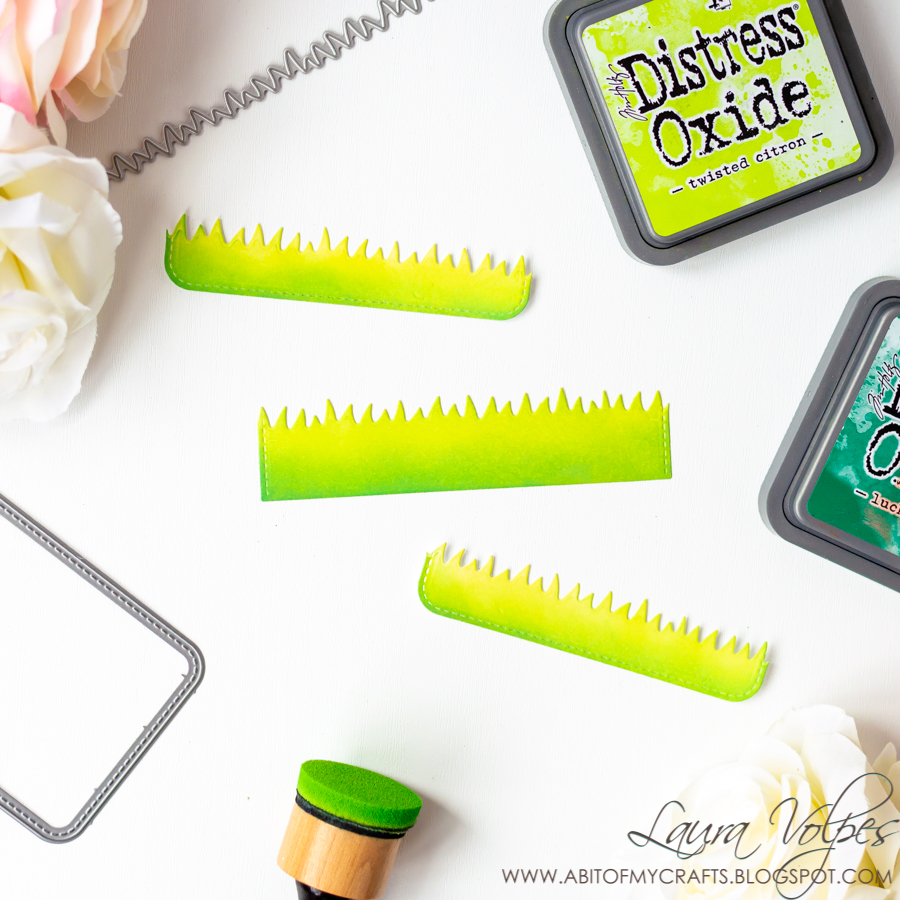
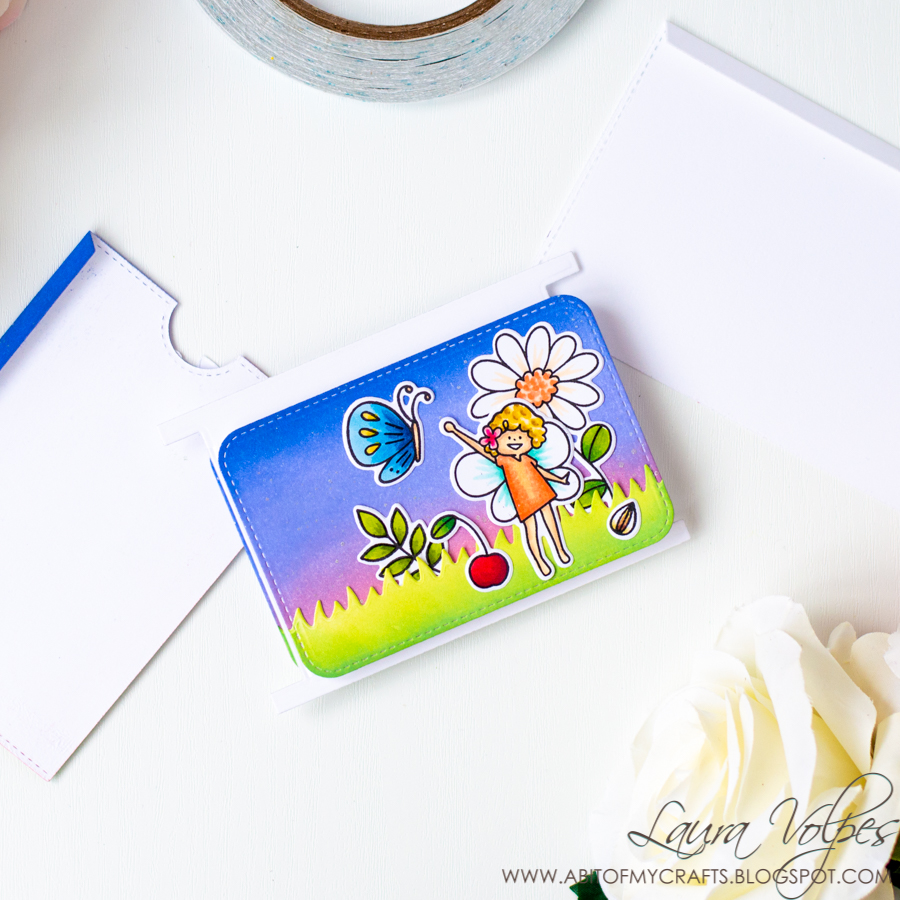
While assembling my scenes, I made sure to leave some empty space on the sides of the two rounded rectangles – these panels will be the sides of the slider card, and the areas that I left empty will not show once the slider card is open. You can see clearly what I mean in the pictures of the completed projects, included in this post.
If you prefer, you could instead adhere the grassy borders to the sky at this stage, and glue the images only after having assembled the slider.
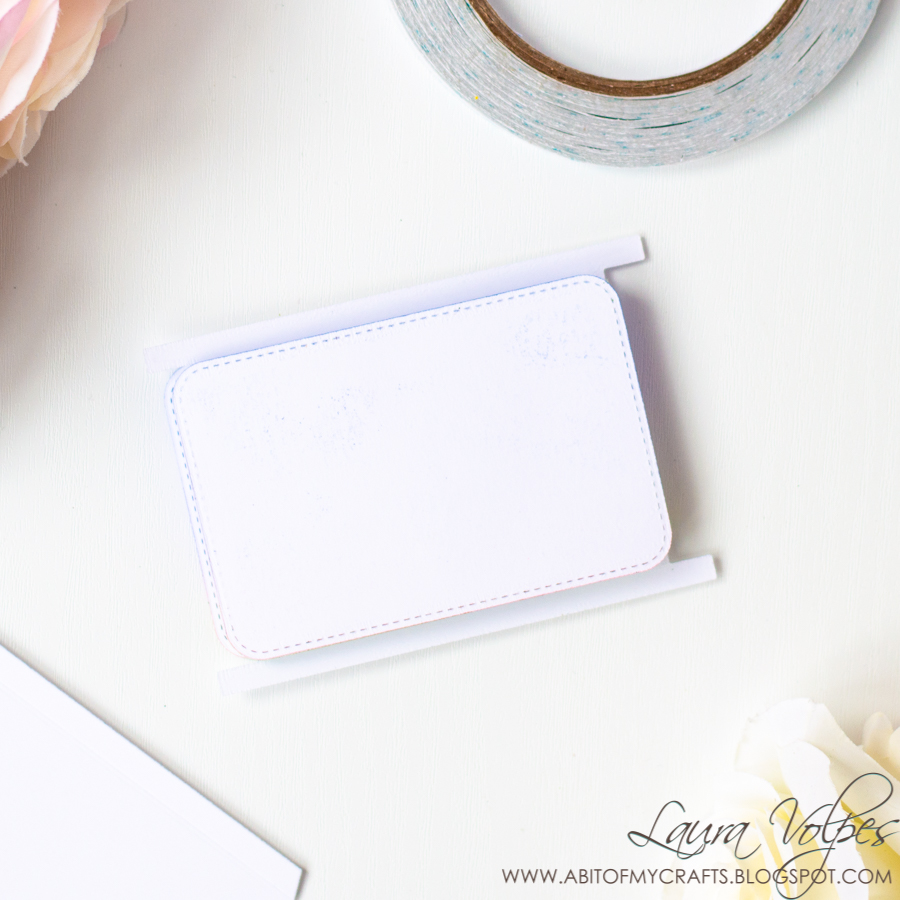
At this point, I could start putting the slider element together.
To complete the slider I needed to die cut another rectangular panel like the larger one I decorated above. This will be the back of the slider.
I also needed to die cut some more white cardstock to create the “pivot” for my slider. This will sit between the front and the back panels and will allow the sides to actually slide. To this purpose, I cut a stripe of clear packaging (you could use stamp packaging or a shopping plastic bag). The strip is roughly 2 1/4″ wide, and long enough to “hug” the slider pivot panel.
All the dies used are part of the Lawn Fawn Double Slider Surprise set.
I will now guide you step by step on the assembly of the slider mechanism.
First, use some double sided tape to wrap the acetate strip around the slider pivot. You don’t want it to be too loose, but it needs to have some slack so that it can move freely. The acetate is glued to itself, not to the paper.
Slide the acetate, so that the seam with the tape is all the way to the left edge of the pivot (a little further to the left compared to what you see in the picture above). Add some double sided adhesive in that same position and use it to adhere one of the slider sides.
Make sure that the left edge of the slider side is aligned with left the edge of the pivot (to the central portion, not to the strips at the top and bottom of the pivot). Adhere the side face up.
Next, flip over the pivot. The panel we have just adhered is now facing the work surface.
Add some double sided tape to the acetate, as close as possible to the left edge of the pivot (see below).
Take the second slider side and adhere it face down to the acetate strip, aligning its edge with that of the slider pivot.
And here it is. The basic slider mechanism is ready!
We now need to glue it to the slider front and back panels. Start by folding the flaps of those die cuts…
…and then tuck the slider pivot against the fold of each flap, in order to adhere it between the front and back panels. I think that the best adhesive to use for this step is 1/8″ double sided tape.
Repeat the same step and glue the back of the slider to the pivot too.
At this stage play a little with your slider to make sure that the sides didn’t catch on any of the adhesive…and also because it’s fun!
All that’s left to do now is to glue the slider to our card.
I created the card background with the largest die in the Lawn Fawn Large Stitched Rectangle dies and the Gotta Have Gingham 6×6″ paper pad, also by Lawn Fawn. I then glued everything to a white card base.
I decorated the card with some leftover images and added my sentiment.
For the sentiment I used the Lawn Fawn Oh, Gnome stamp set and heat embossed the greeting happy birthday on black cardstock with white embossing powder. The die that cuts the banner is part of the Lawn Fawn Double Slider Surprise set. And that’s my card for today! I really hope you like it and I hope you found this tutorial useful! I want to say a big thank you to Scrapbook.com for the opportunity to share my creation with you, and I wish you all a wonderful day!
When possible, affiliated links are used at no additional cost to you. This means that if you make a purchase through one of these links, I will get a small commission at no additional cost to you. The money I earn this way goes towards running this blog and my YouTube channel. Thank you for supporting my creative journey! 💖
Like this:
Like Loading...