

Hello everyone! Today I am super excited – and slightly embarrassed – because I uploaded my very first card making video on YouTube! Yaaay!
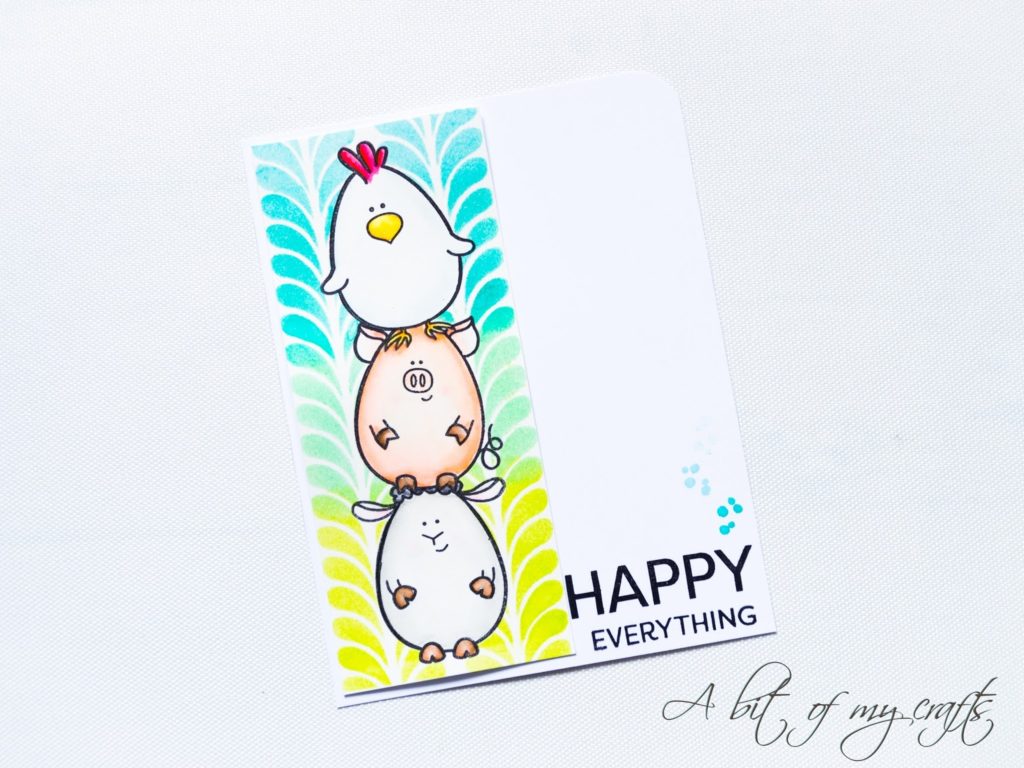
Chick: Carmine Red, Haze Blue, Yellow, Bright Yellow
Piglet: Tea Rose, Flamingo Pink, Mid Brown
Sheep: Light Gray, Gray, Mid Brown
I also added blushes to all the images with some Almond Pink.
To create the background I used distress inks and a stencil by Just a Trace. The colors I used are Twisted Citron, Cracked Pistachio, Peacock Feathers and Tumbled Glass. In the video you can see in detail how I use masking to create my scene and the background. I then used my Tonic Studios guillotine to trim out the white borders and obtain a strip as my focal panel.
For the sentiment I used the Happy Days set, also by Create a Smile, which I stamped in Ranger Archival Ink in jet black on an A2 sizes card base. I then taped down the focal panel with some tape runner by Tonic Studios to the card base. I added some details above the sentiment using one more stamp from the Eggstraordinary Egghunt set and distress inks in Peacock Feathers and Tumbled Glass. As a final touch, I rounded off one of the corners of my cards with my We R Memory Keepers Corner Chomper. And that’s it! Here is the video with the card making process!
Make sure to check it out, and if you like it, consider sharing it and leave me a thumbs up! 🙂 This way I will know you appreciated it!
I am not sure how often I will manage to publish more videos, I will try to work out a schedule, and we shall see 🙂
For now I wish you all a great day! Ciaooo!
Non sono un’esperta né per quanto riguarda il card making né per quanto riguarda YouTube, ma ho pensato che sarebbe stato divertente provare a realizzare un video! Penso anche che sia più facile per voi e avere un’idea di come creare le mie card in questo modo. Perciò spero che lo guarderete, e mi piacerebbe molto sapere cosa ne pensate! Sono perfettamente consapevole del fatto che c’è ancora tanto spazio per migliorare, ma bisogna pur iniziare da qualche parte, giusto? 😉
Pollo: Carmine Red, Haze Blue, Yellow, Bright Yellow
Maialino: Tea Rose, Flamingo Pink, Mid Brown
Pecora: Light Gray, Gray, Mid Brown
Ho anche aggiunto un po’ di rosa sulle guance usando il colore Almond Pink.
Per creare lo sfondo ho utilizzato uno stencil di Just a Trace e Distress Inks nei colori Twisted Citron, Cracked Pistachio, Peacock Feathers e Tumbled Glass.
Ho poi utilizzato il mio tagliacarte a ghigliottina di Tonic Studios per tagliare via i bordi bianchi e ricavare una striscia che sarà poi il mio punto focale. Per il messaggio ho scelto il set Happy Days, anch’esso di Create a Smile, e l’ho timbrato con l’inchiostro Archival Ink in Jet Black di Ranger. Ho poi ho poi incollato il pannello con gli animali alla base del biglietto grazie al mio tape runner di Tonic Studios. Ho aggiunto dei dettagli sopra al messaggio utilizzando un altro timbro del set Eggstraordinary Egghunt, e come tocco finale ho arrotondato uno degli angoli della card utilizzando il Corner Chomper di We R Memory Keepers.
E questo è tutto! Qui sopra potrete trovare il video con tutti gli step per realizzare questa card! Andatelo a vedere, e se vi piace, vi sarei grata se lo condivideste e se lasciaste un like, o un commento! In questo modo saprò che avrete apprezzato!
Non so esattamente con quale frequenza riuscirò a pubblicare altri video…cercherò di organizzarmi un po’ e vediamo cosa succederà! 😉

